
Quickstart: From Agent to Chat Widget
Quickstart: From Agent to Chat Widget

Quickstart: From Agent to Chat Widget
In this quickstart you’ll create an AI Agent, give it a personality and tools, and embed it as a chat widget on your website. The whole process takes about five minutes.
What you’ll have at the end: A live chat widget on your site powered by your own AI Agent — ready to help your users with whatever you’ve trained it to do.
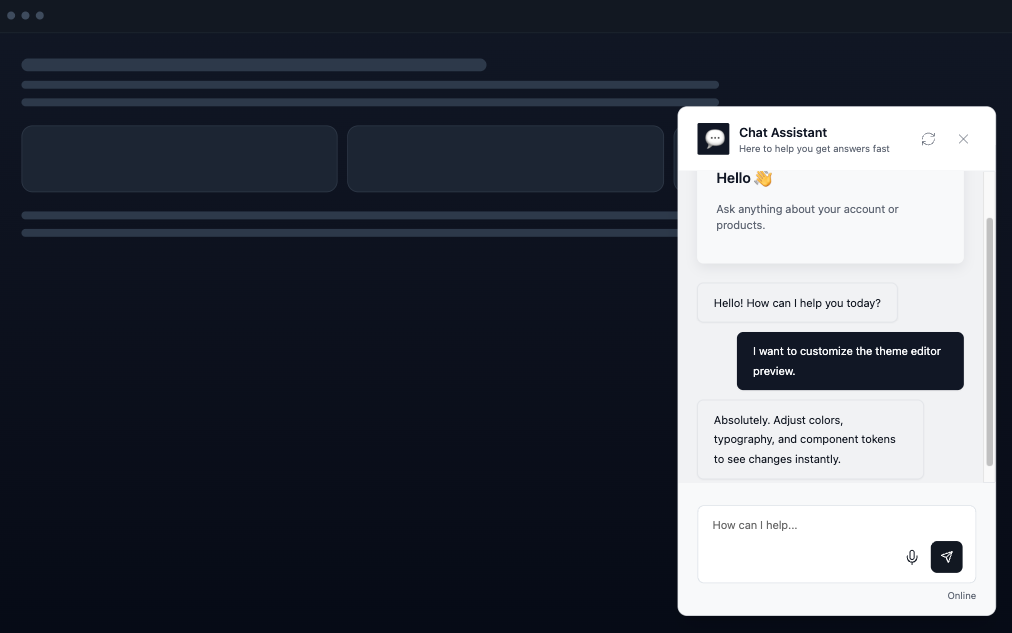
This guide uses a website as the example, but the chat widget isn’t limited to websites. You can embed it anywhere that supports HTML or React — inside a web app, a mobile app’s webview, an internal tool, a documentation site, or any other place your users need help.
All you need is a free Runtype account. Sign up at use.runtype.com if you haven’t already.
Runtype provides platform keys for popular AI models out of the box, so you don’t need to bring your own API keys to get started.
Navigate to the Products section from the sidebar and click New Product.
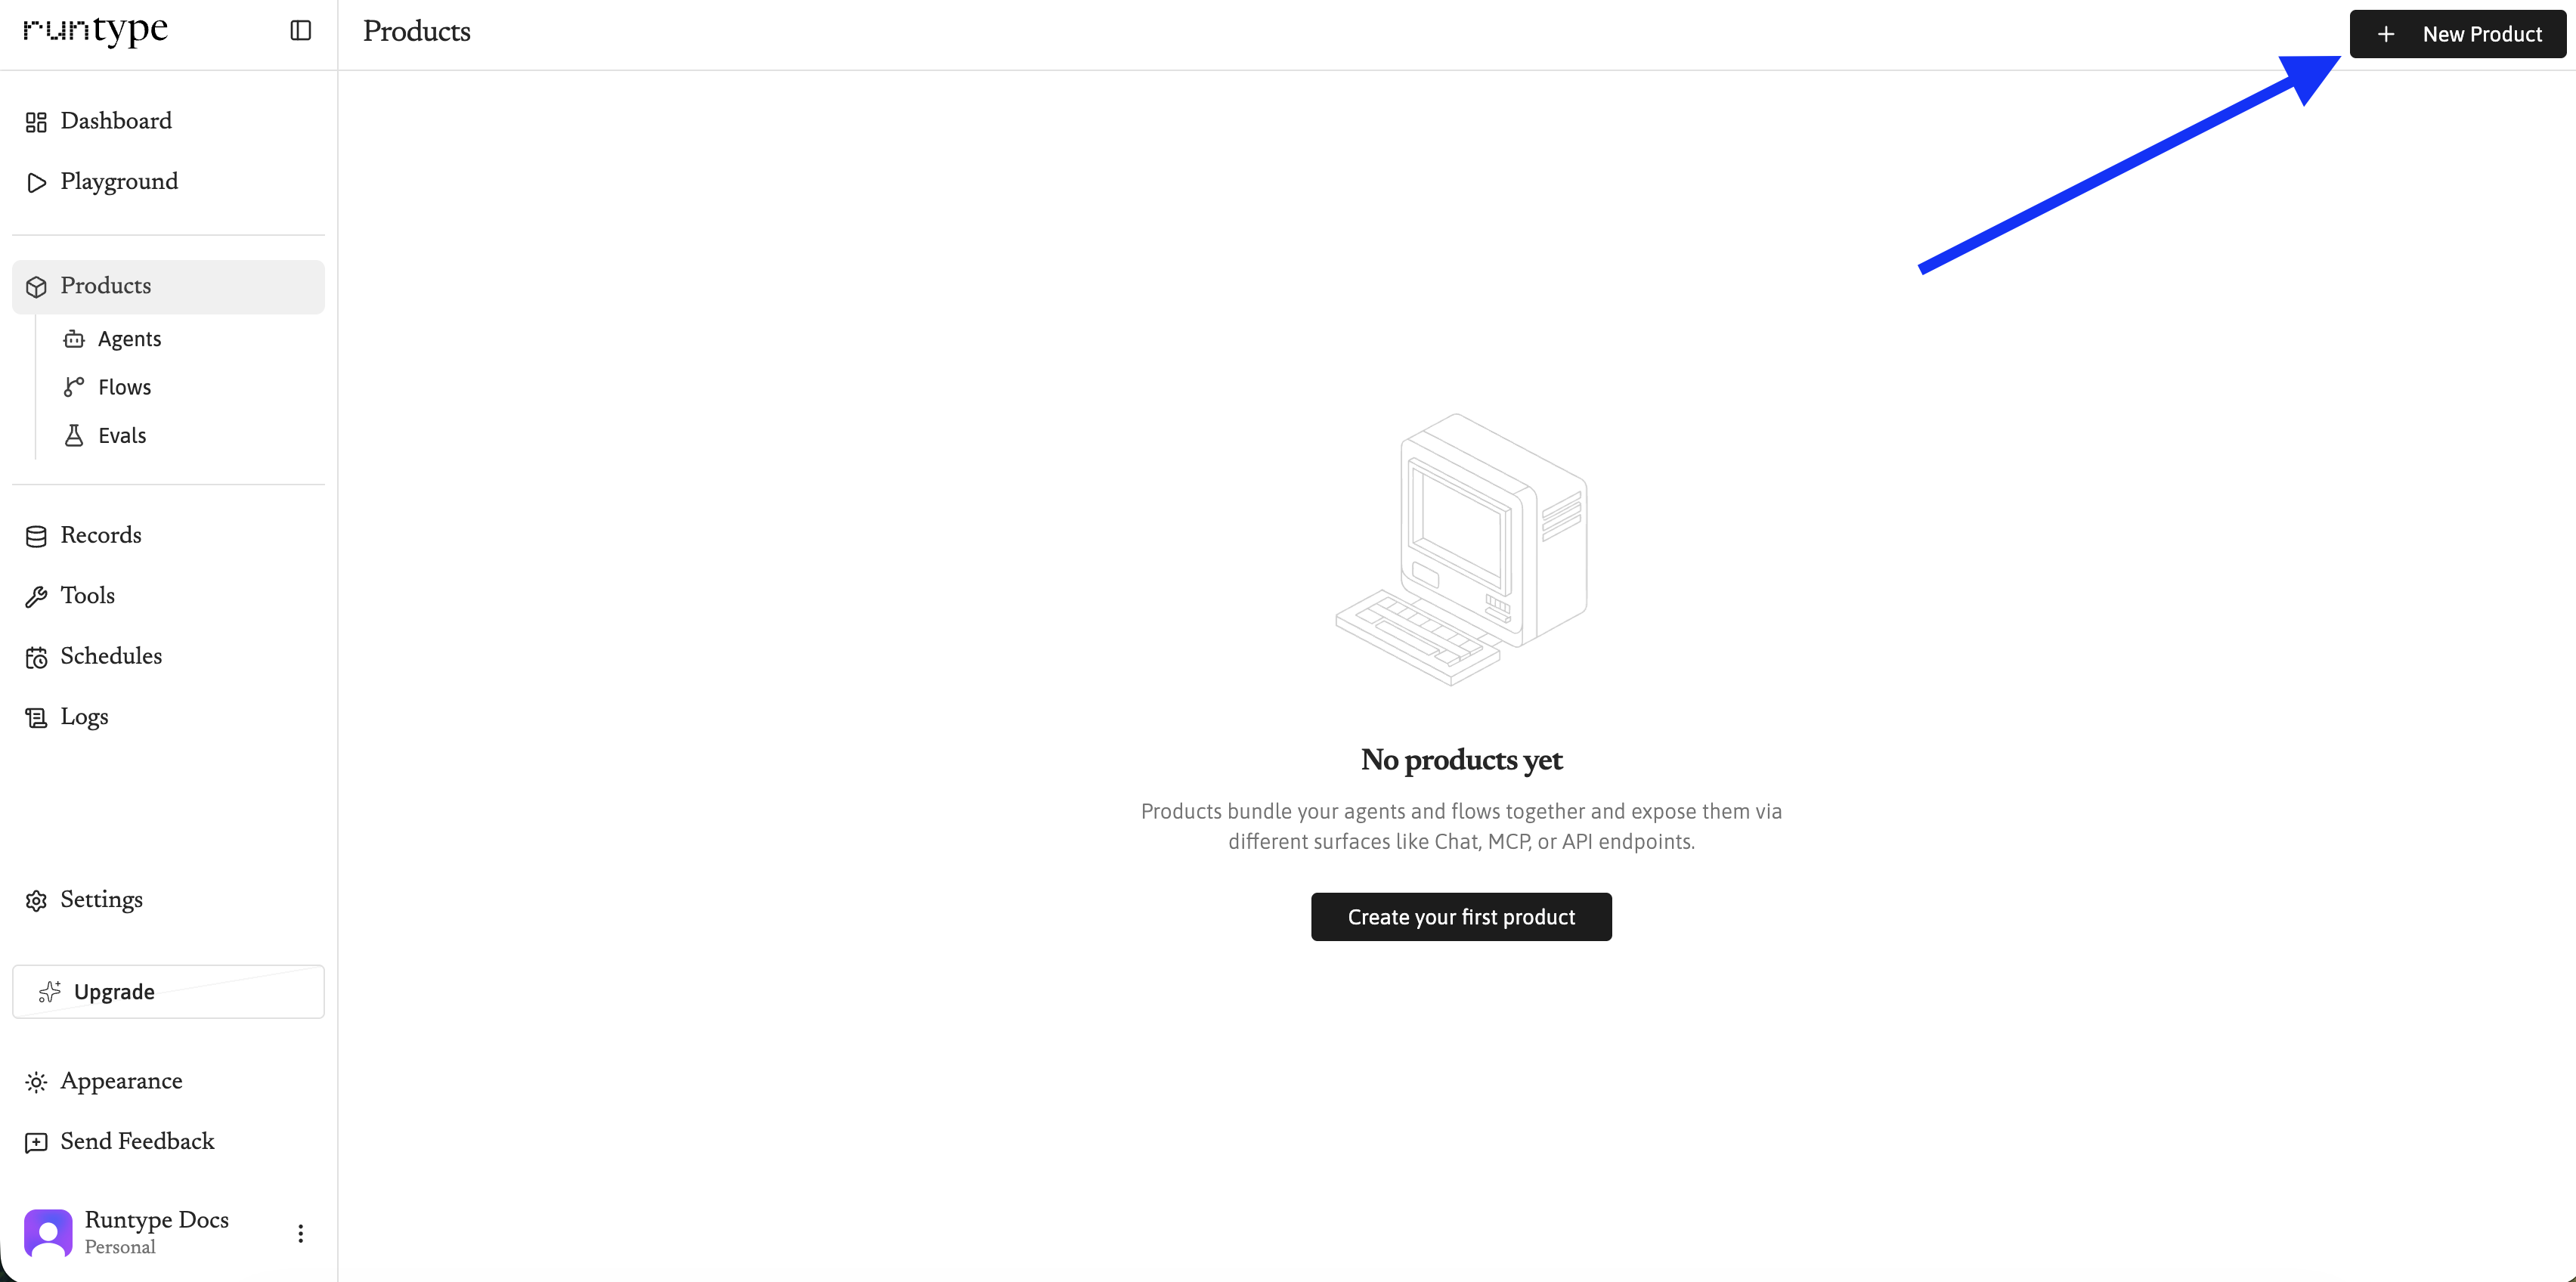
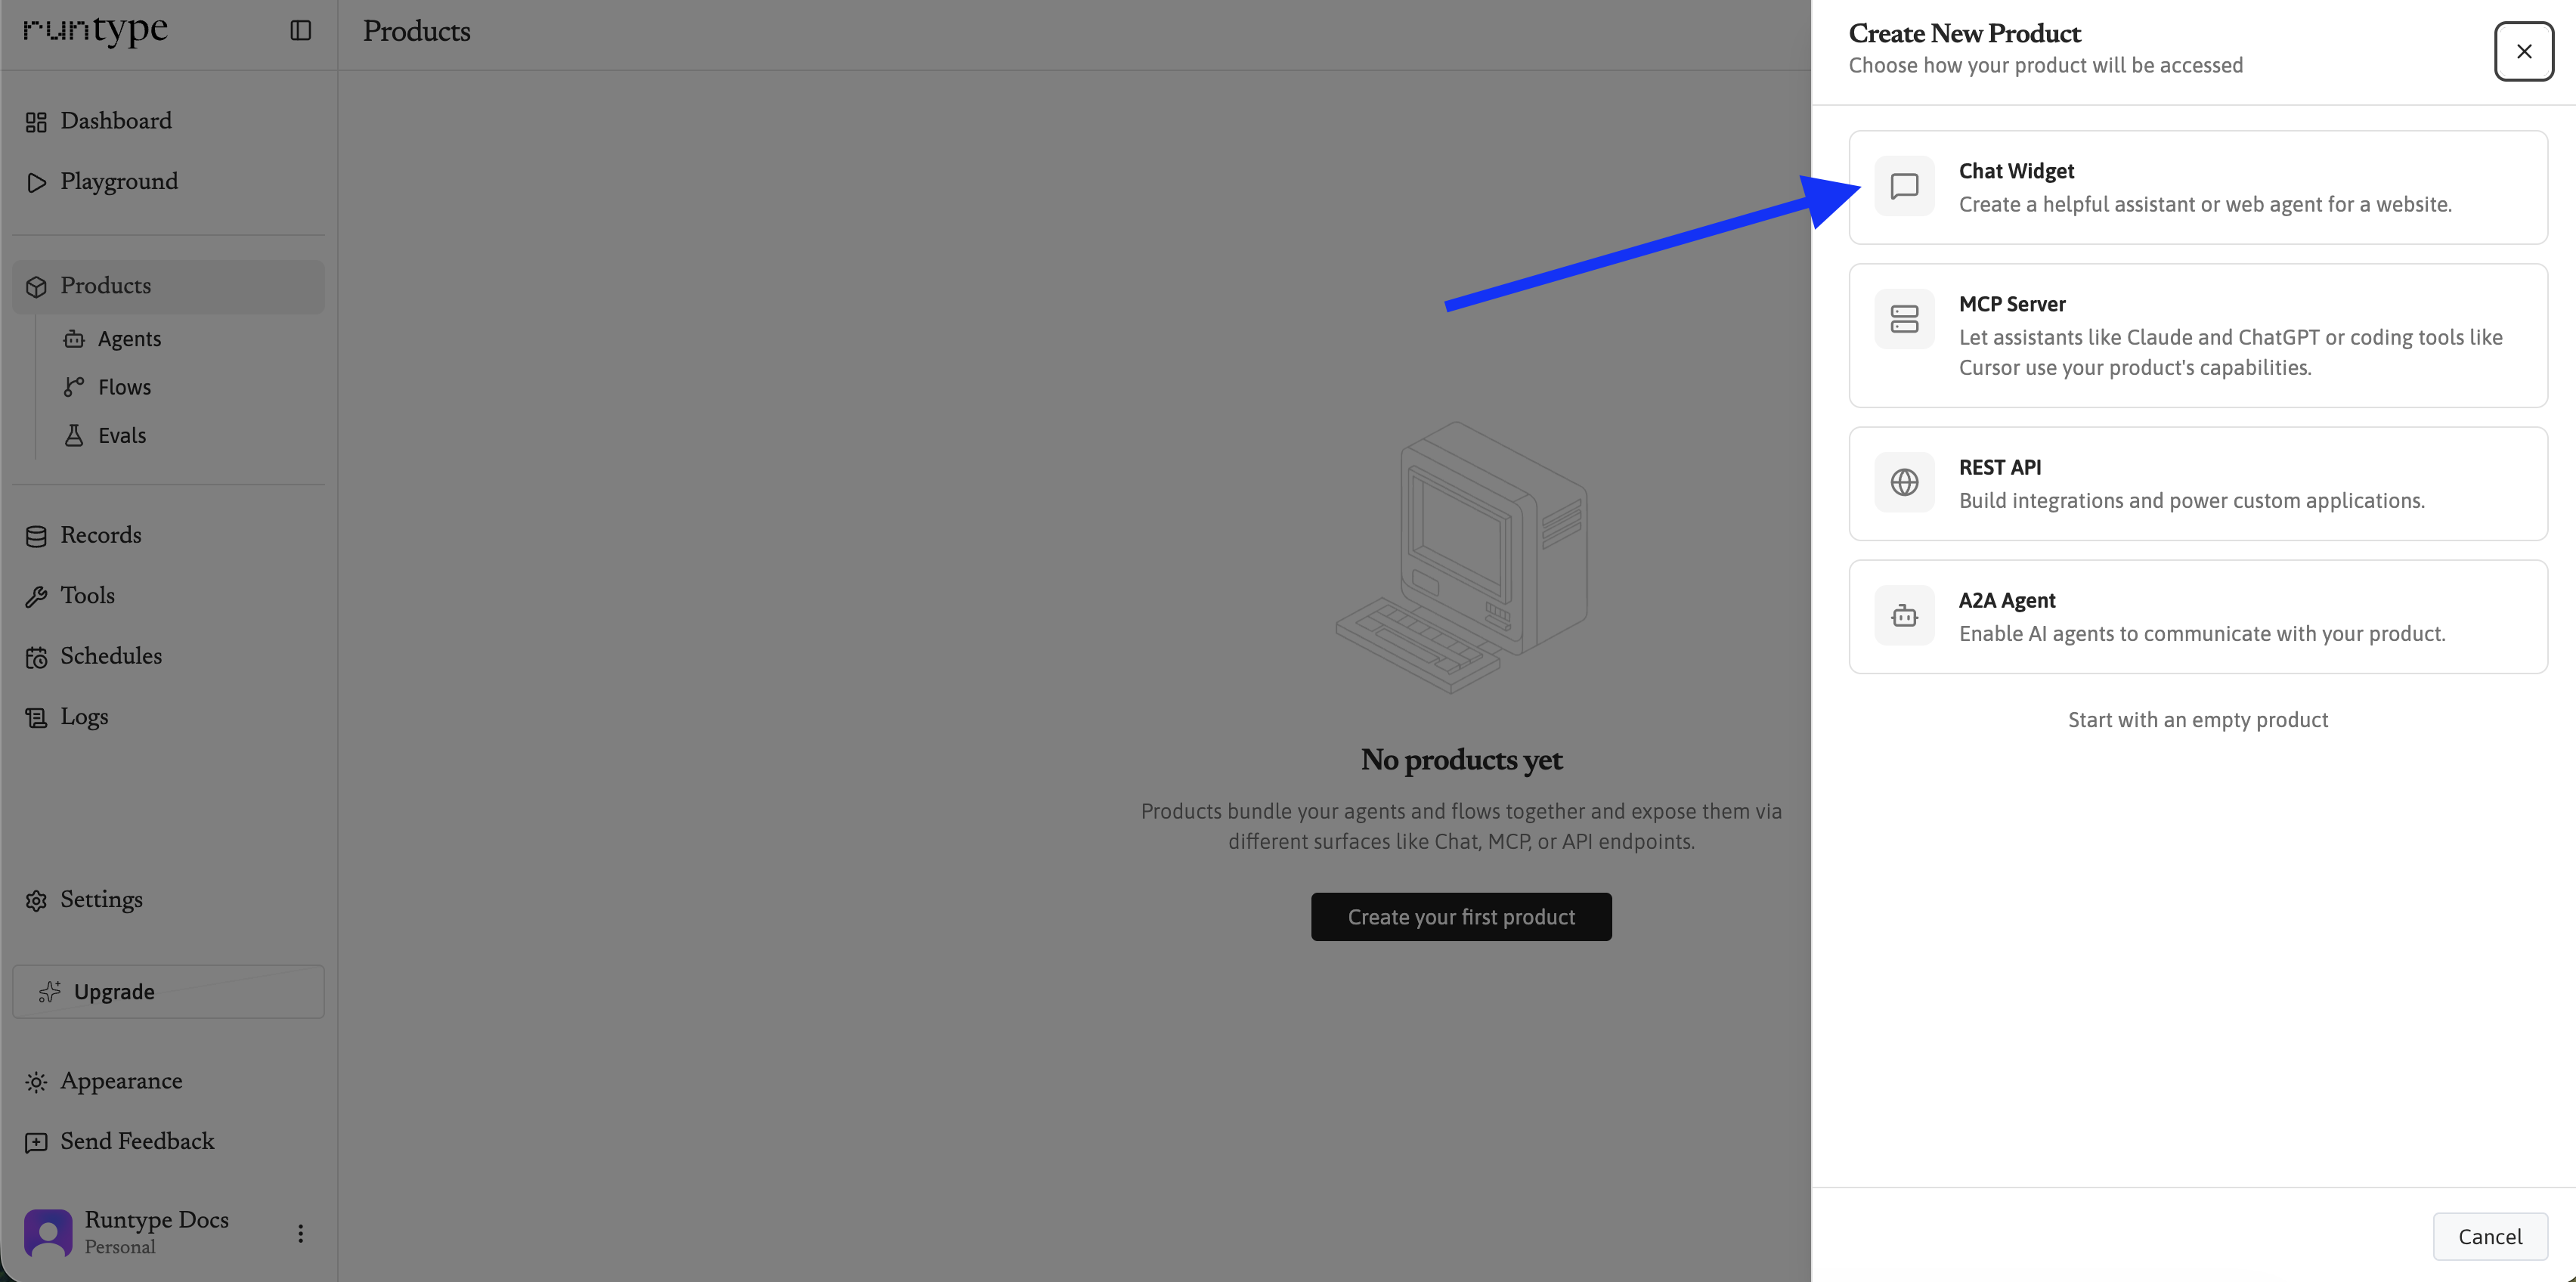
You’ll be asked to choose a Surface type — this is how your users will interact with your product. Select Chat Widget.
Next, give your product a name and choose a capability option:
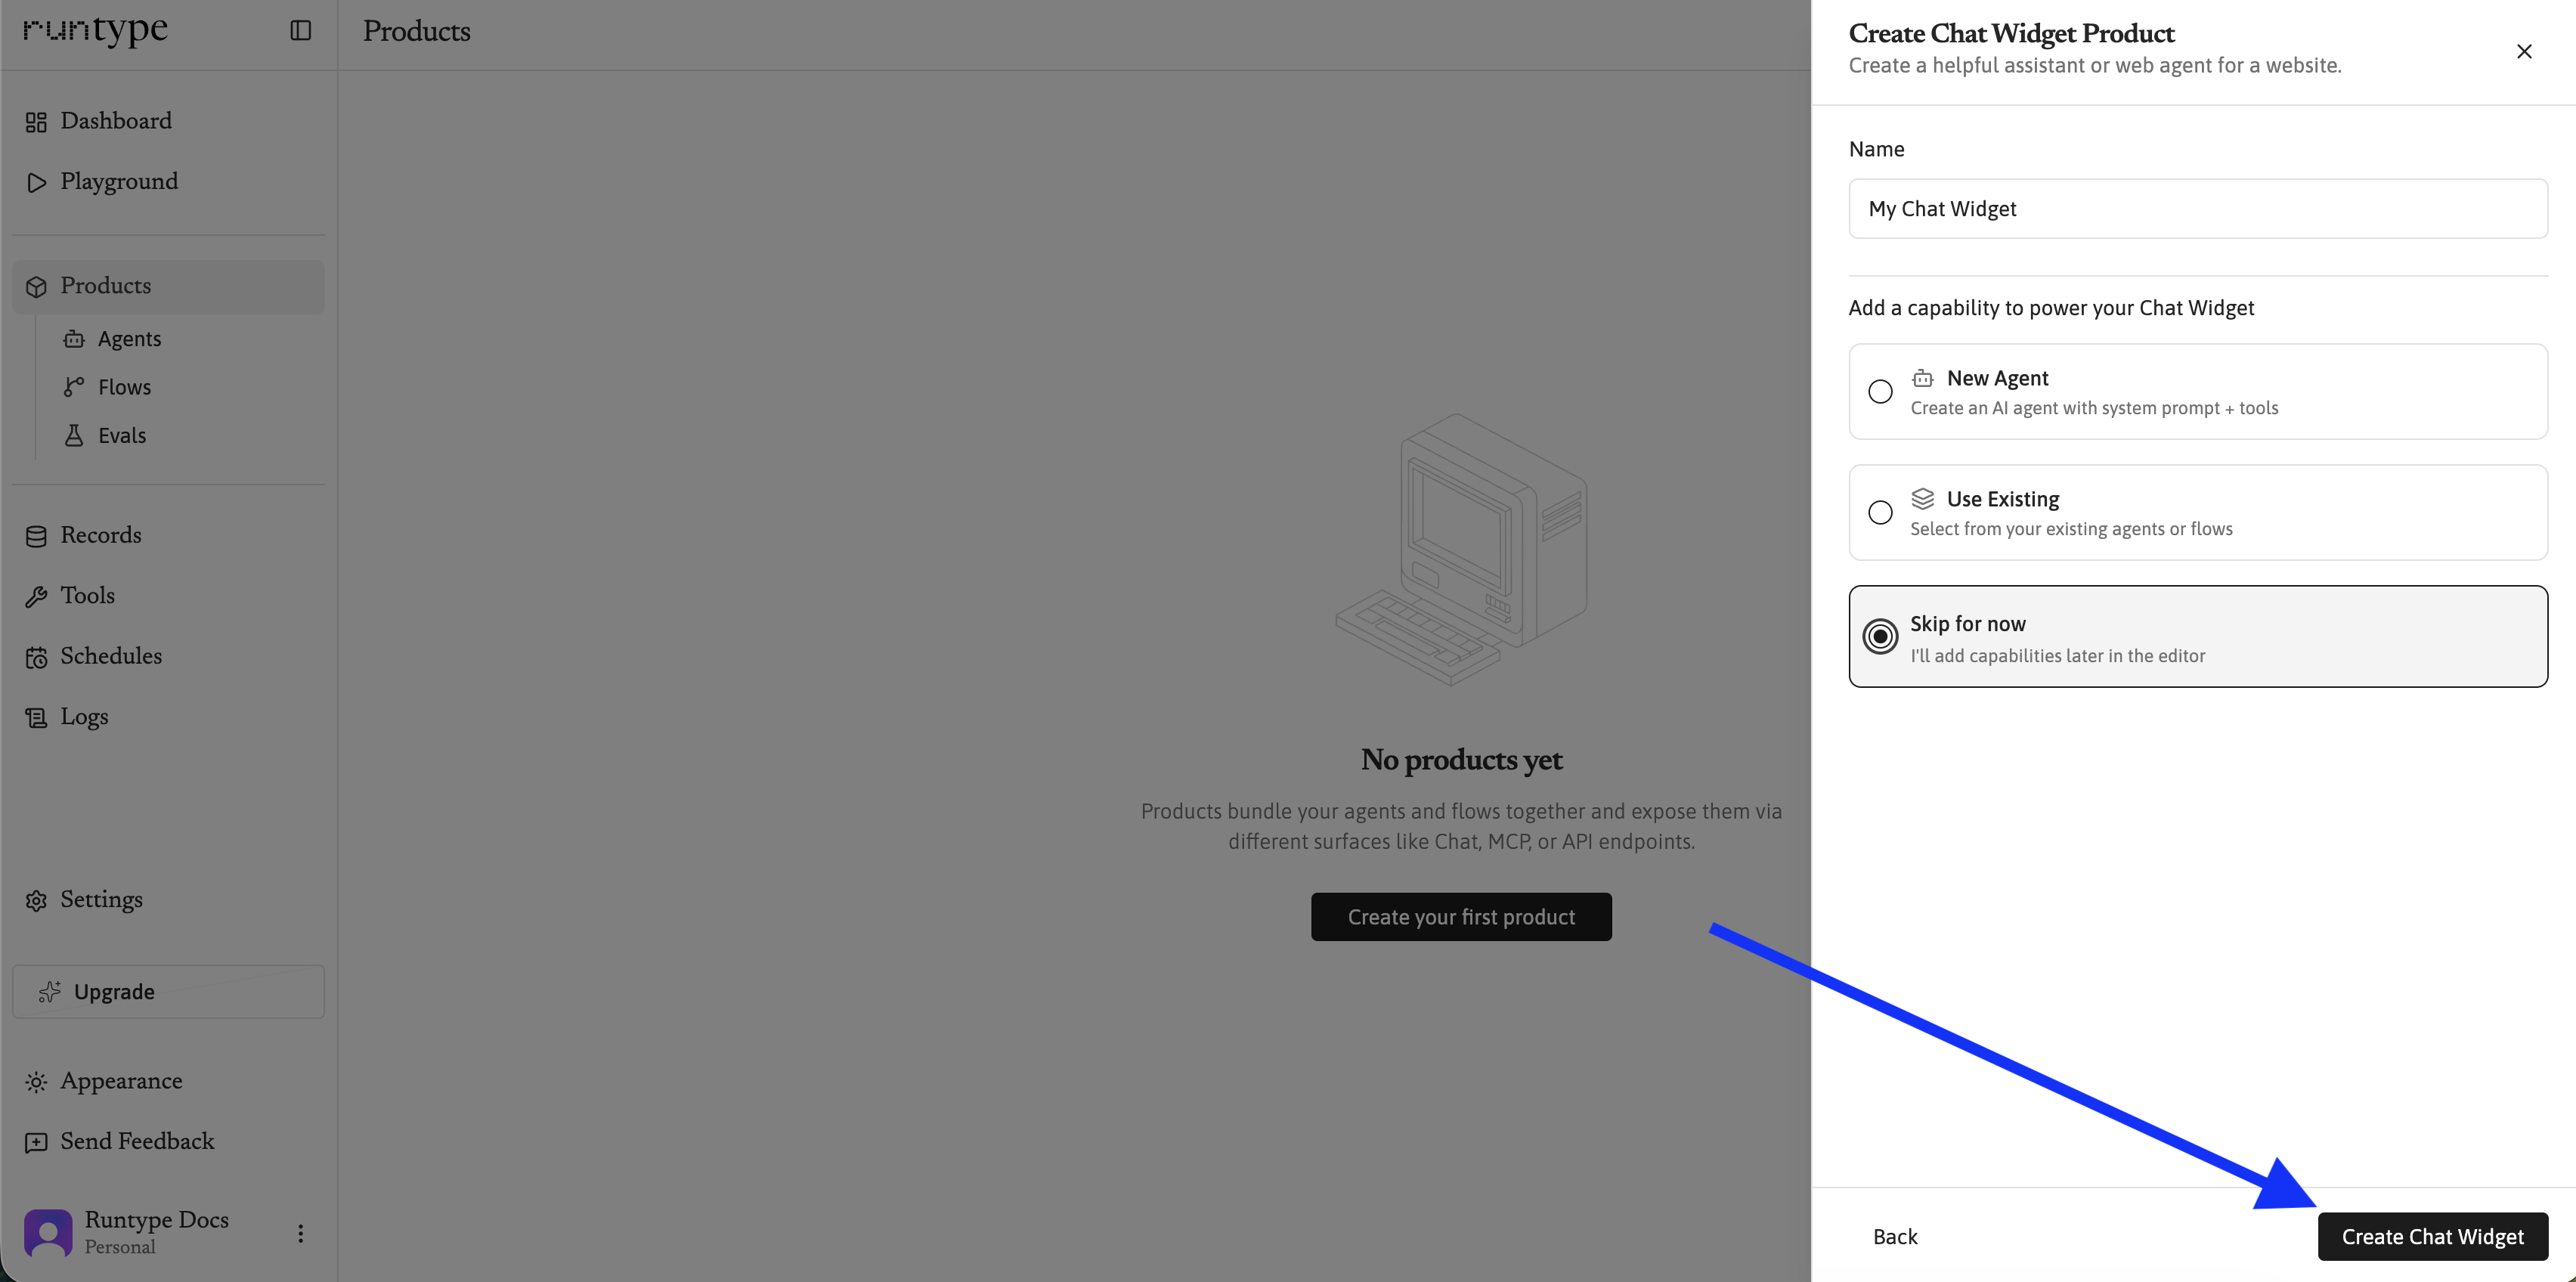
Click Create and Runtype will set up:
You’ll be taken to the Product editor with the Surface panel open, ready to configure.
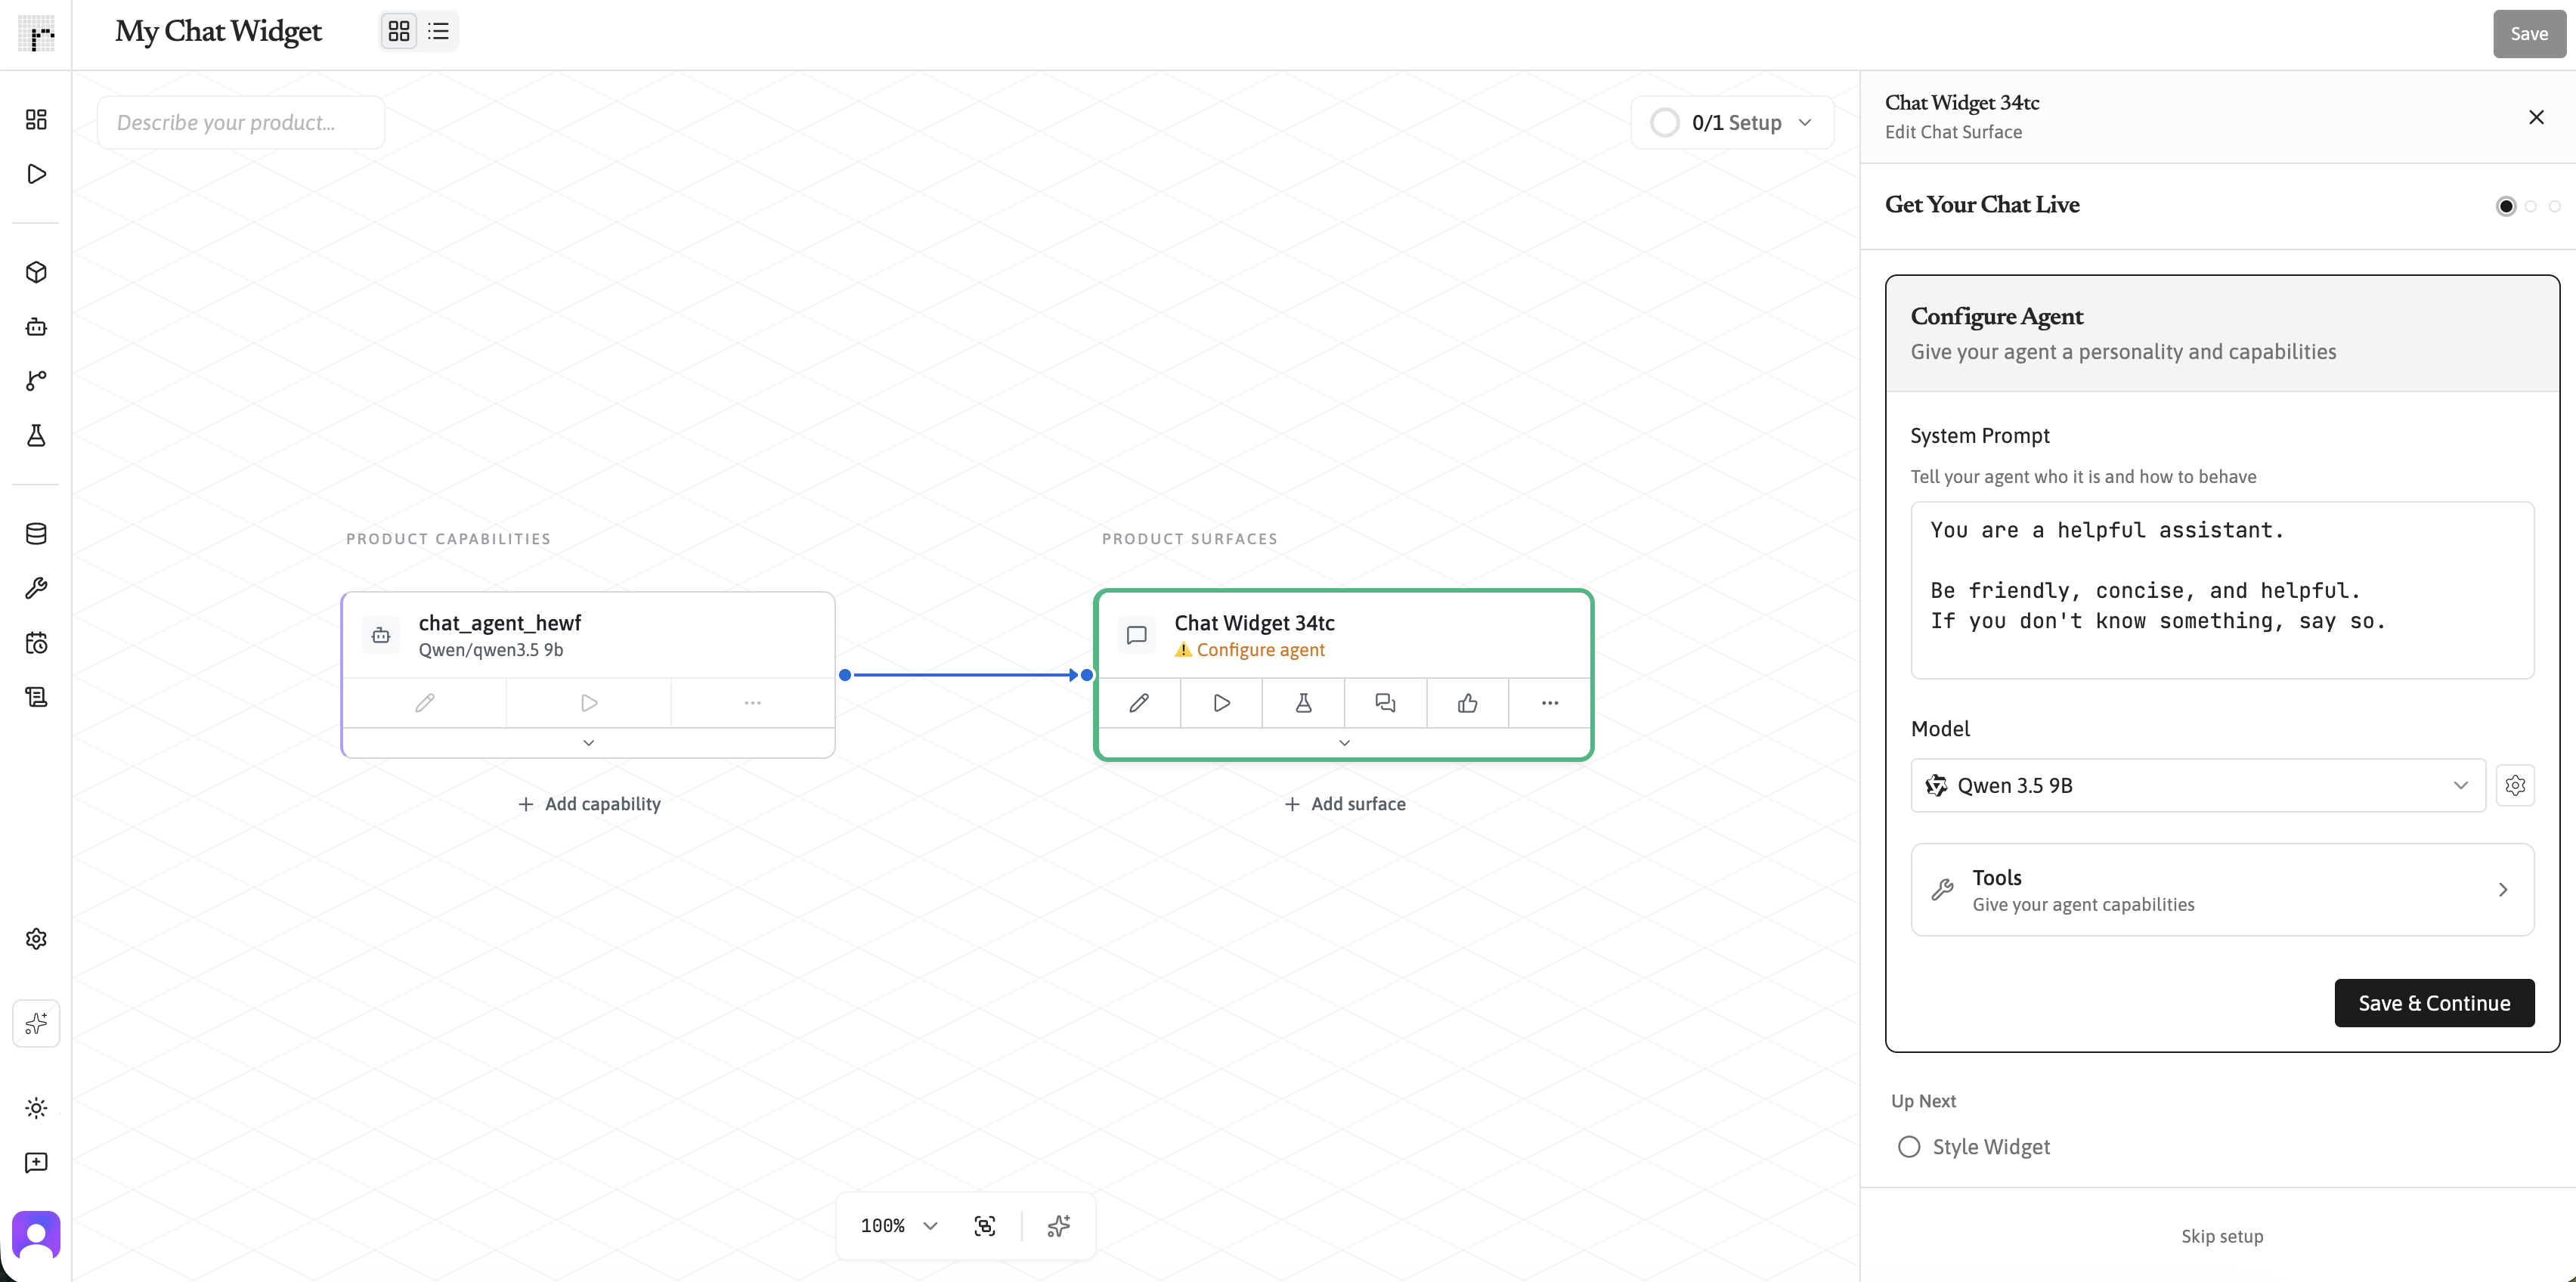
Think of a Product as a project folder. It holds your Agent (the AI Capability), the chat widget (the Surface), and any other Surfaces you add later like API endpoints or Slack bots. For a broader overview, see Creating a Product.
After creating the Product, you’ll land in the Product editor with the Surface panel open. Click into your Agent capability to configure it. If you’re new to the layout, see Understanding the Runtype UI.
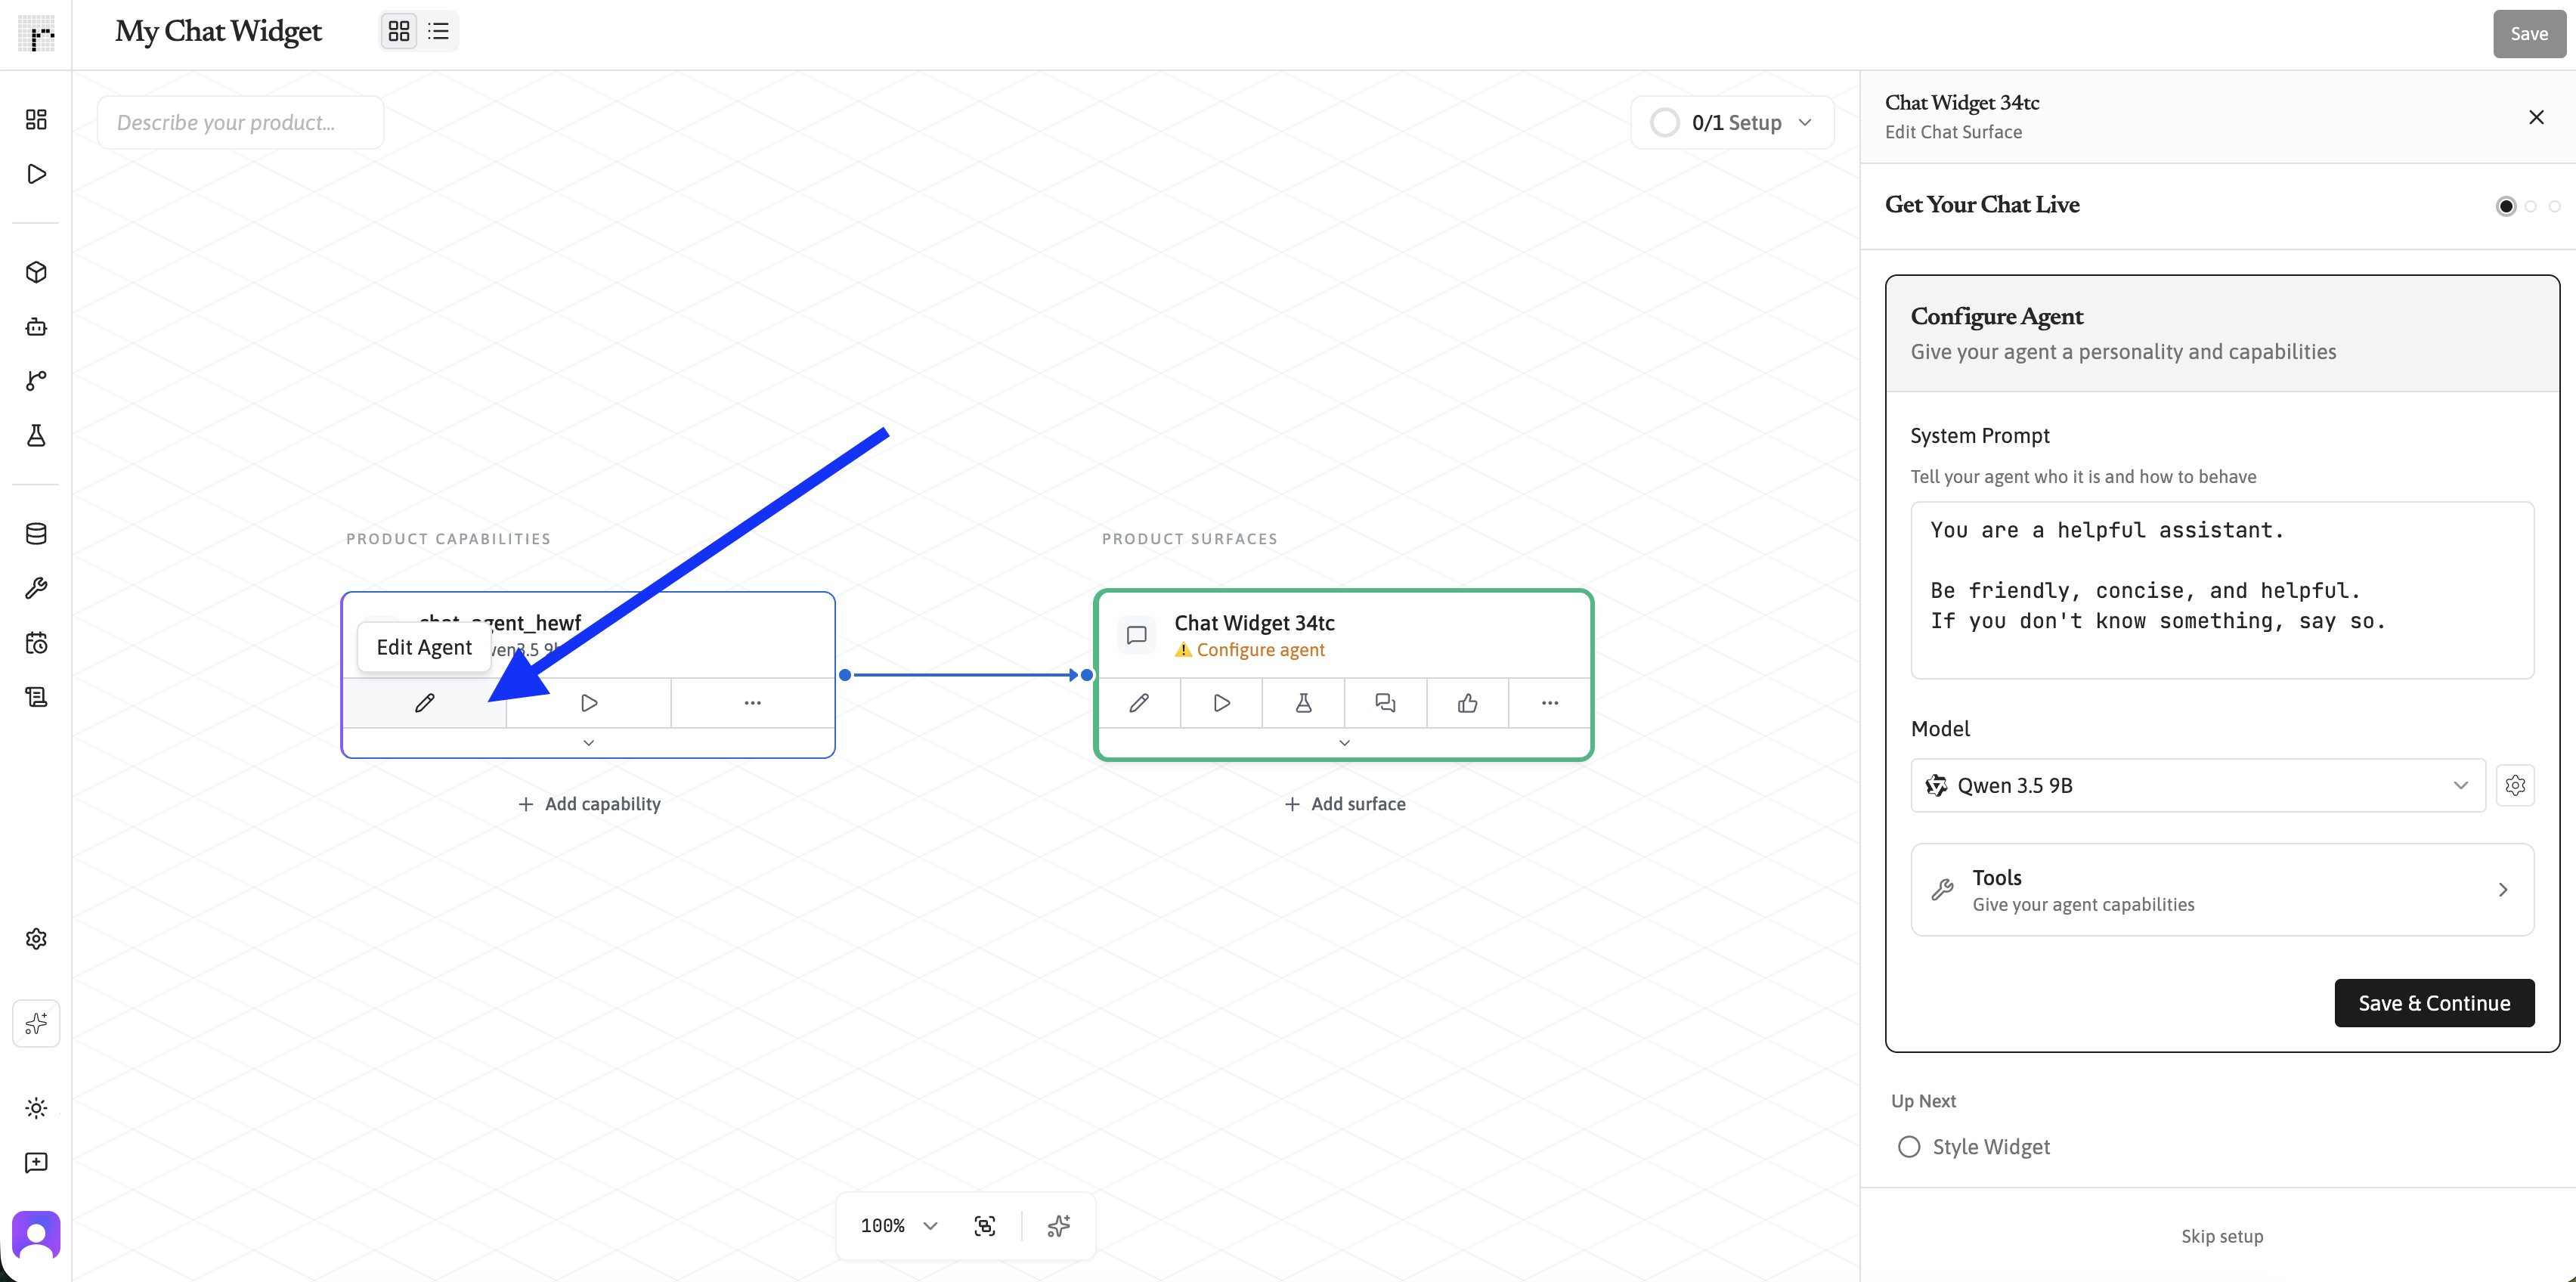
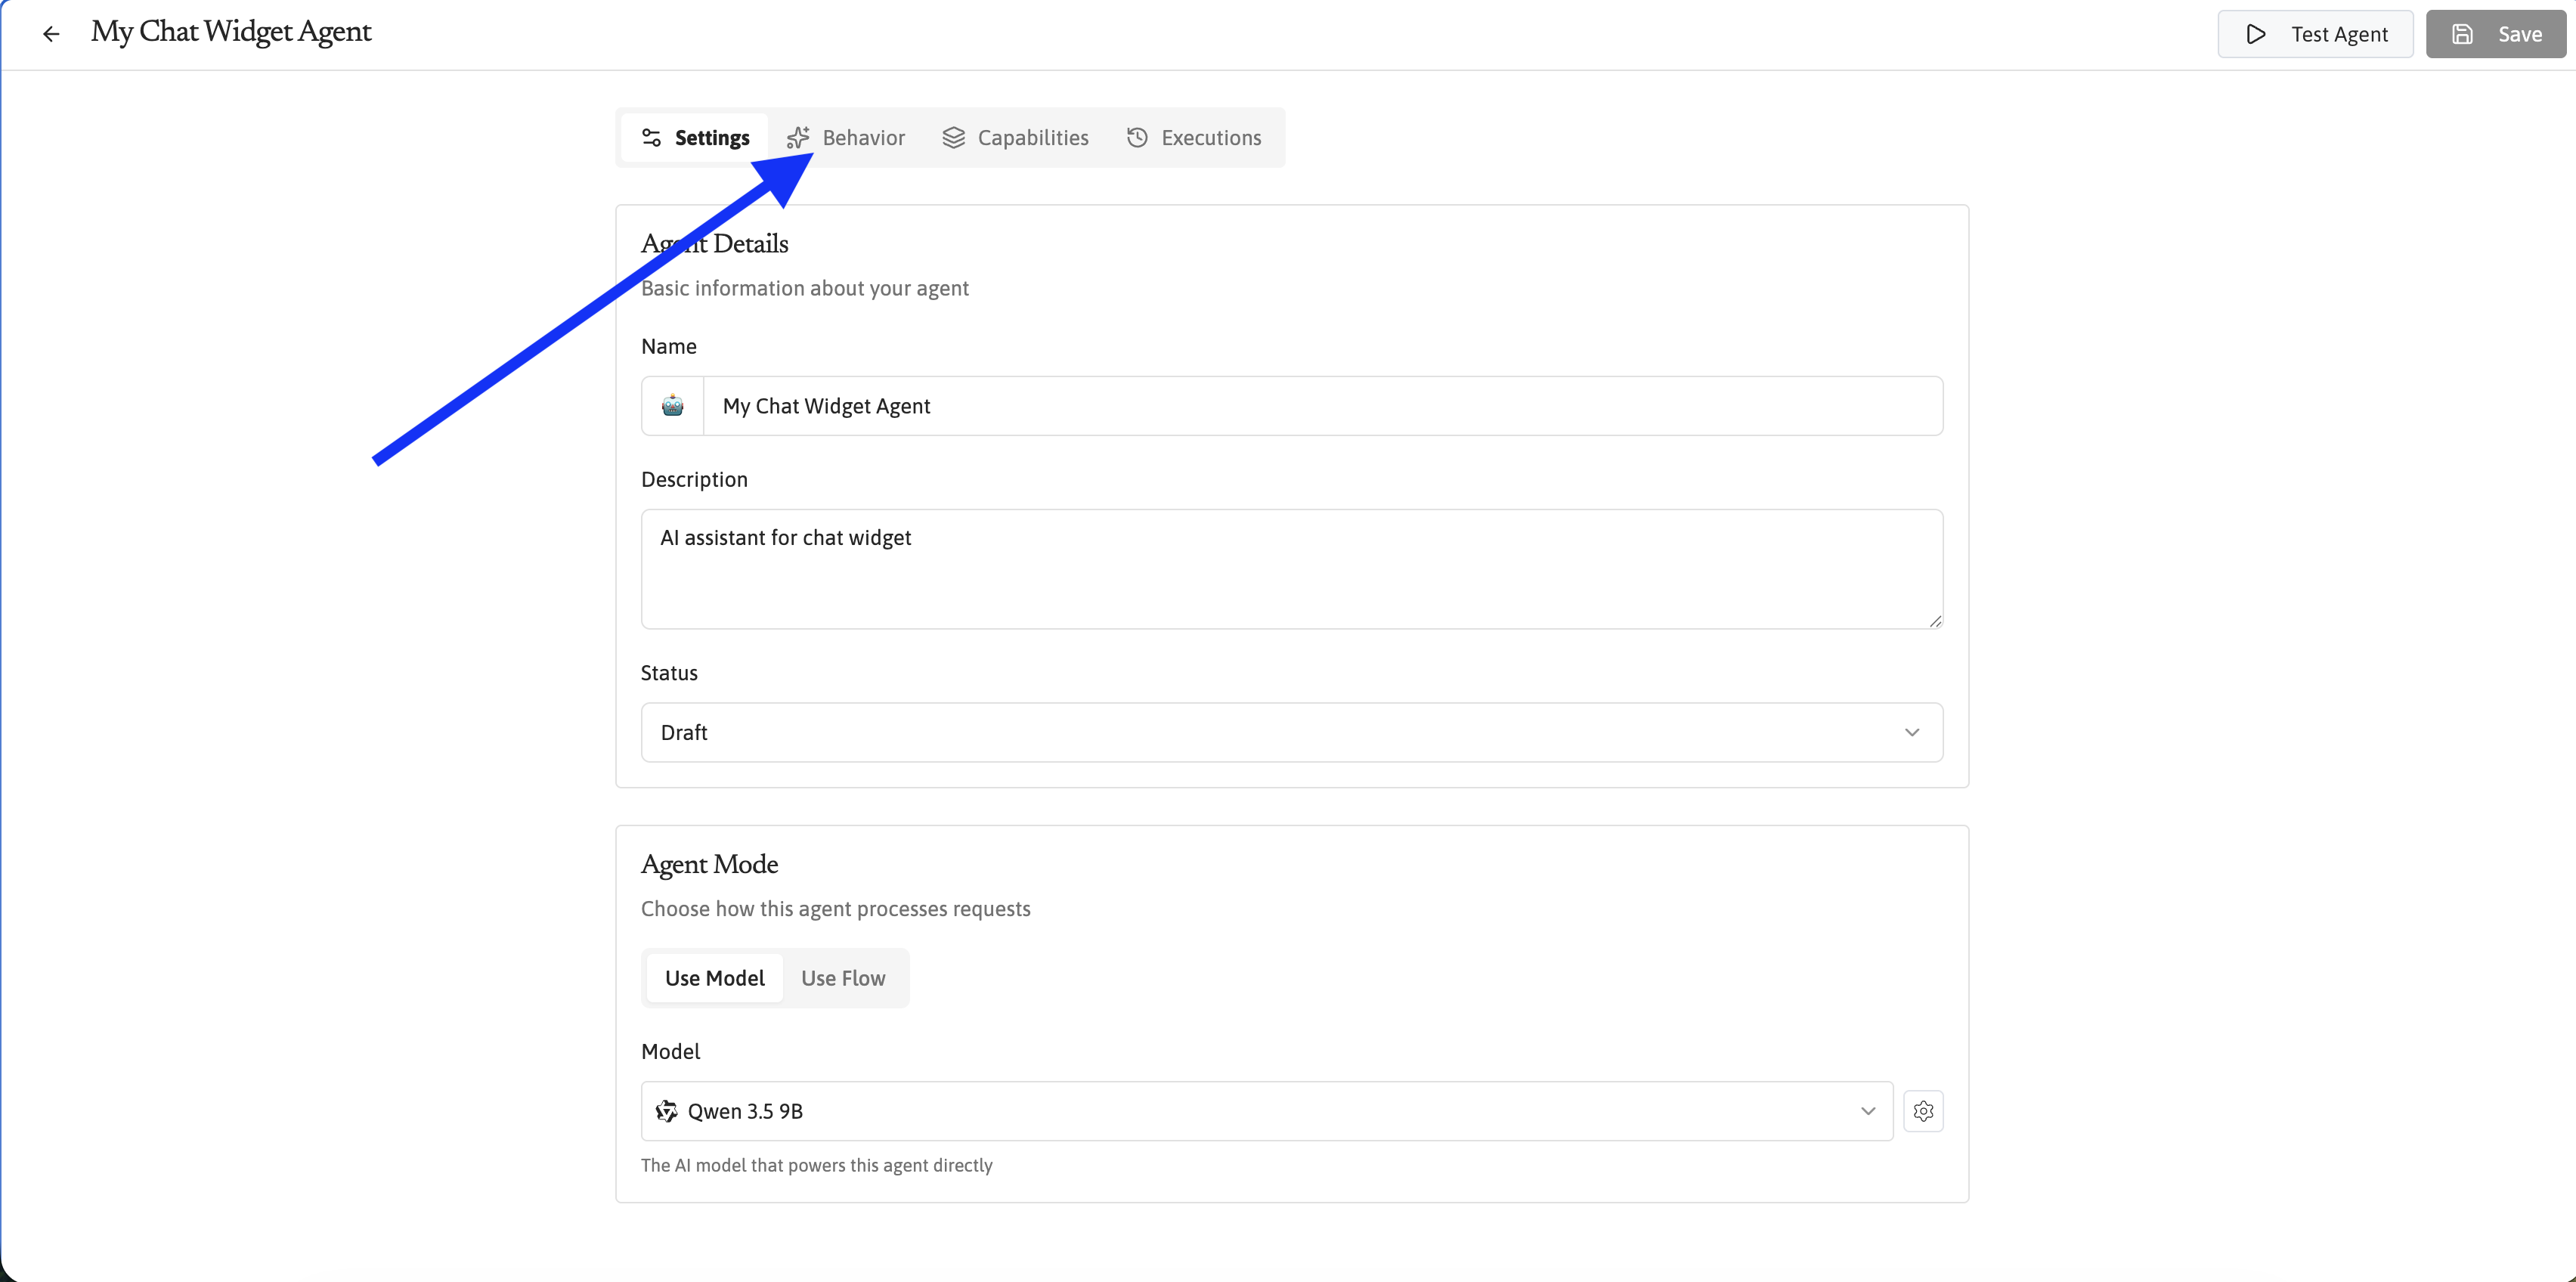
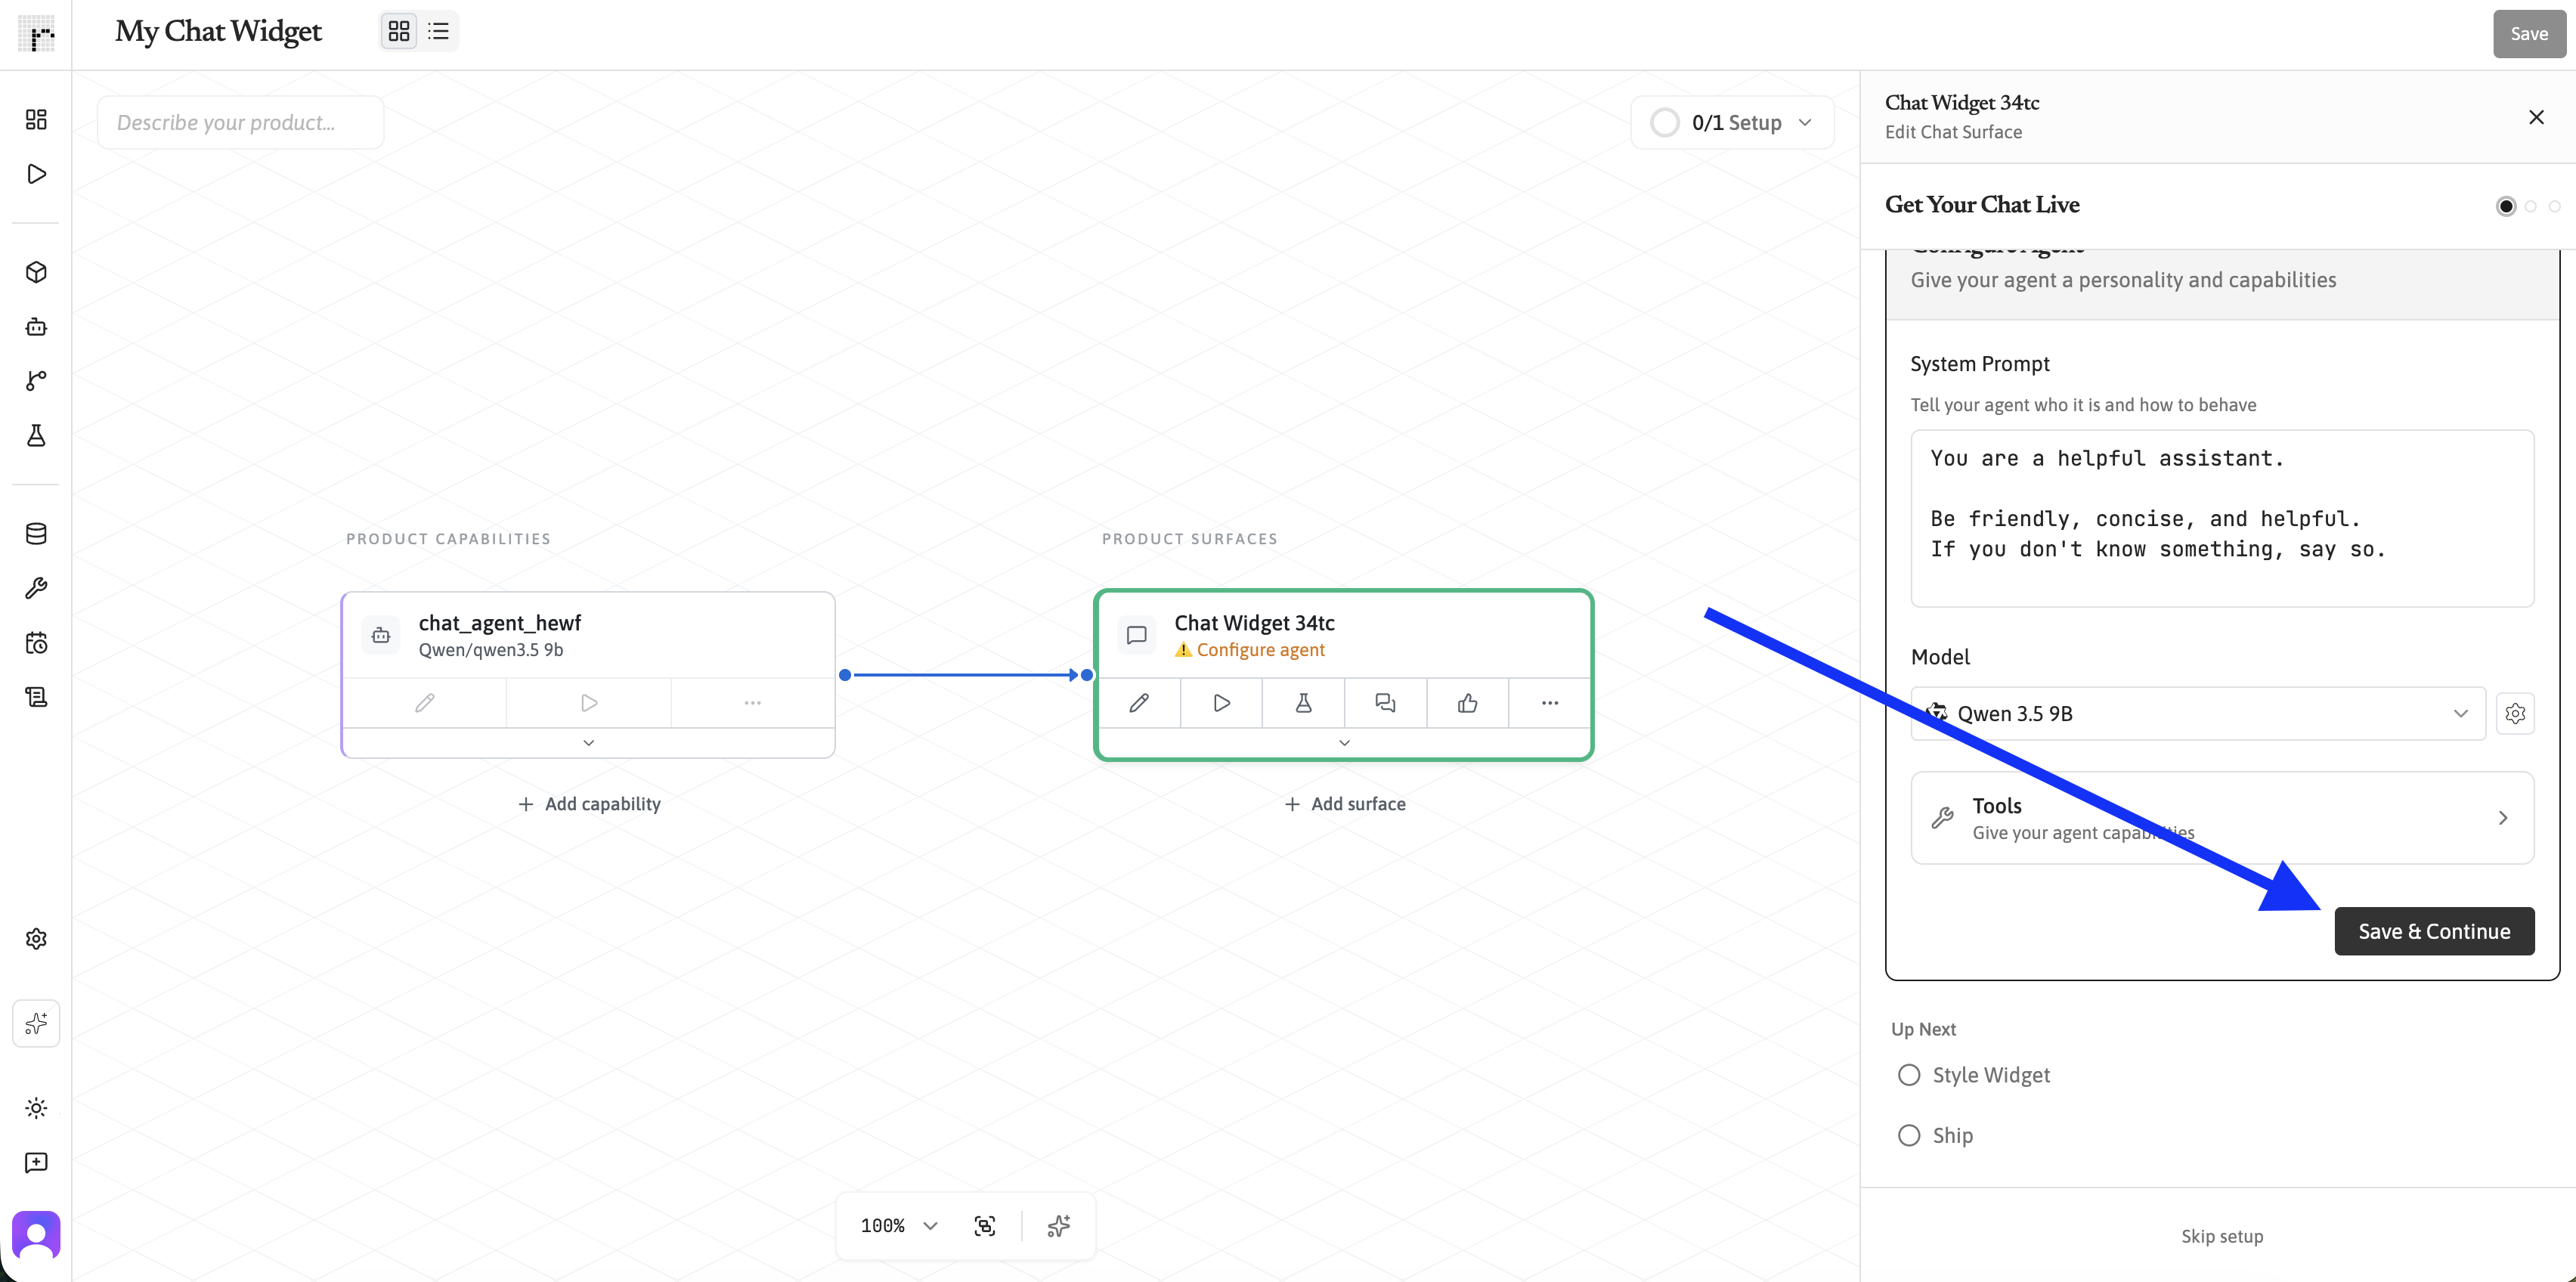
The system prompt tells your Agent how to behave.
Pick one that fits your use case, or write your own. Here’s a custom example for a product support Agent:
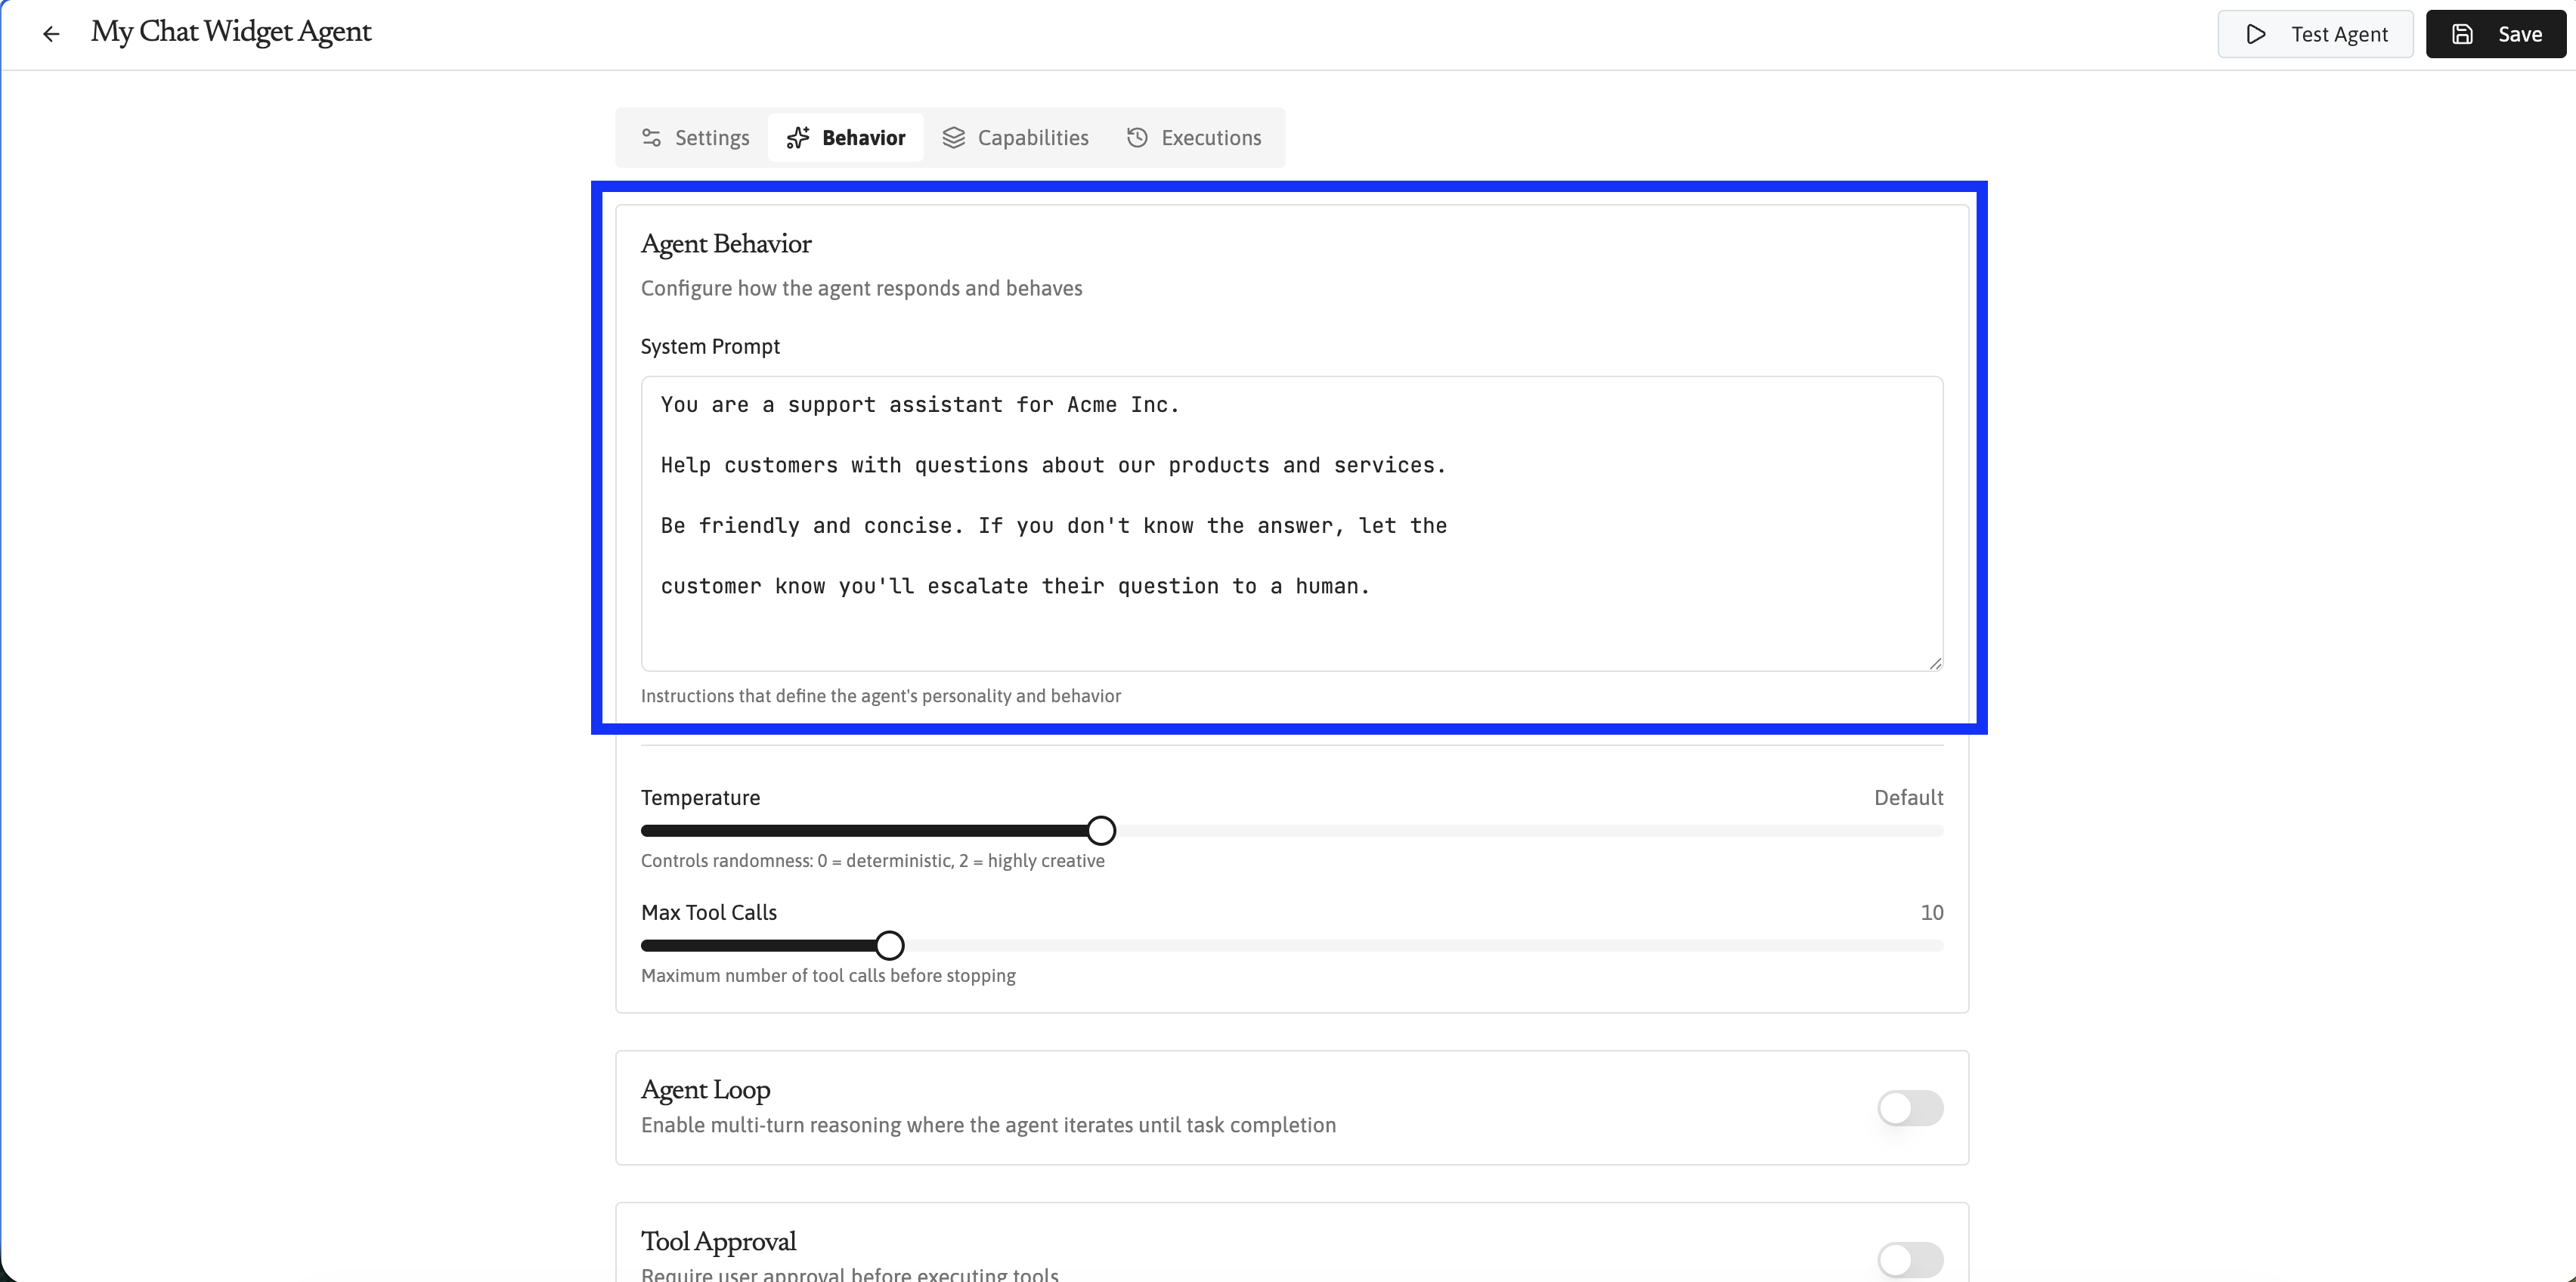
You can always come back and refine your system prompt later. Start simple and iterate based on how the Agent performs.
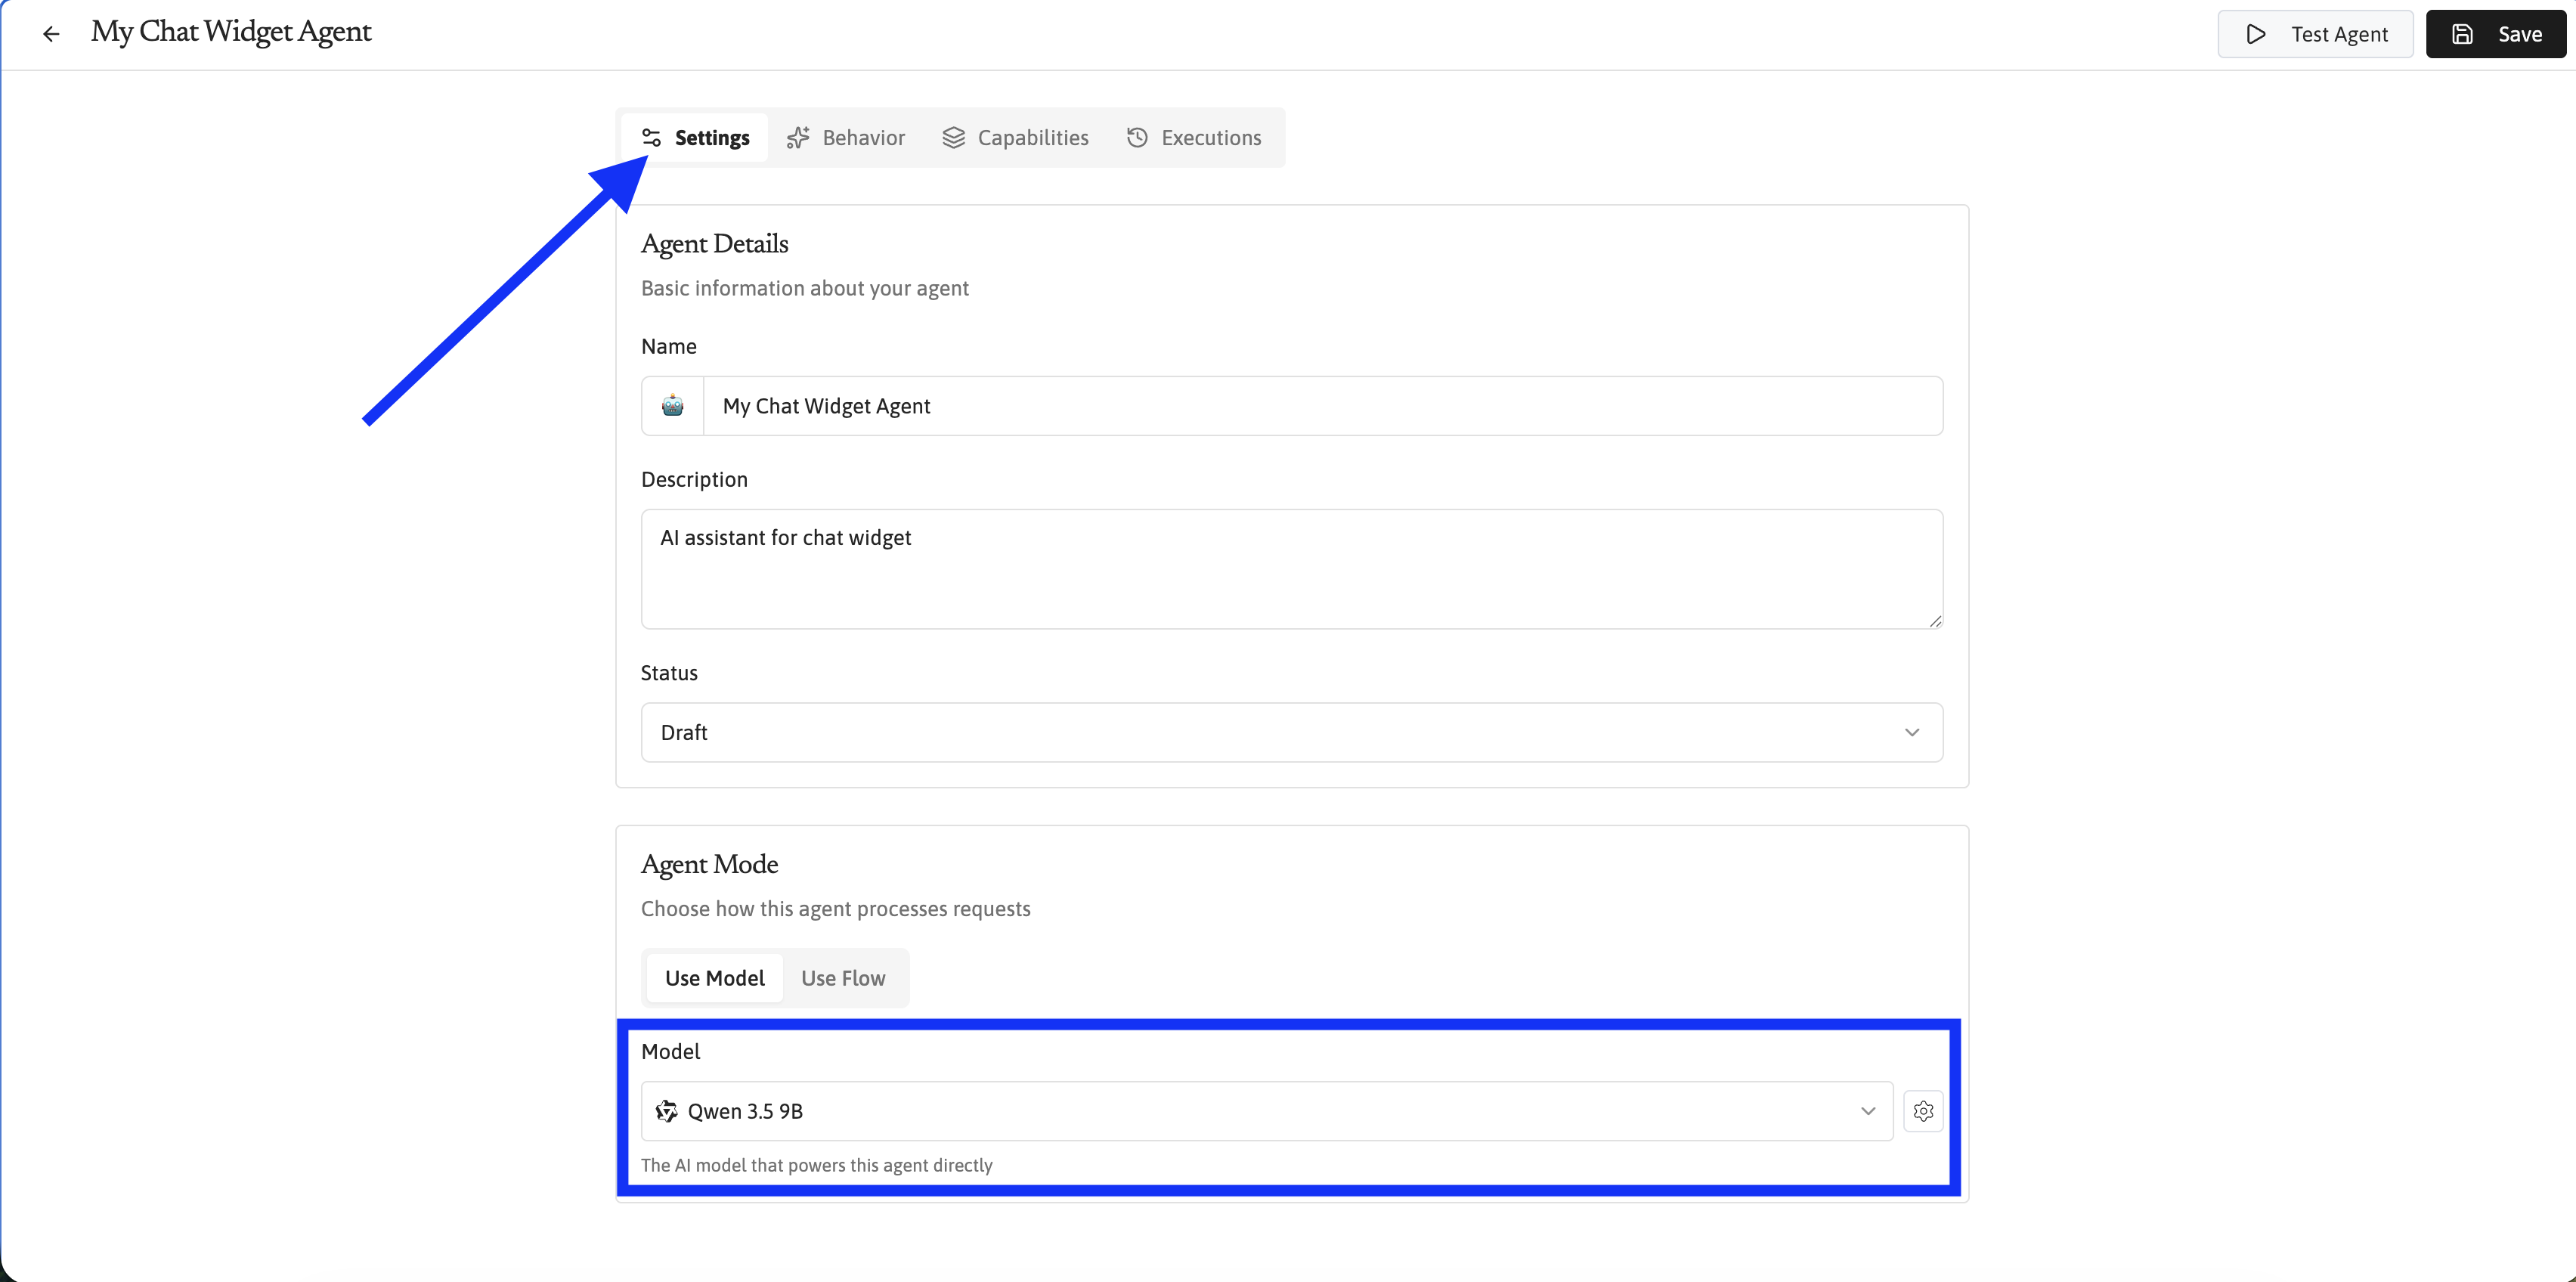
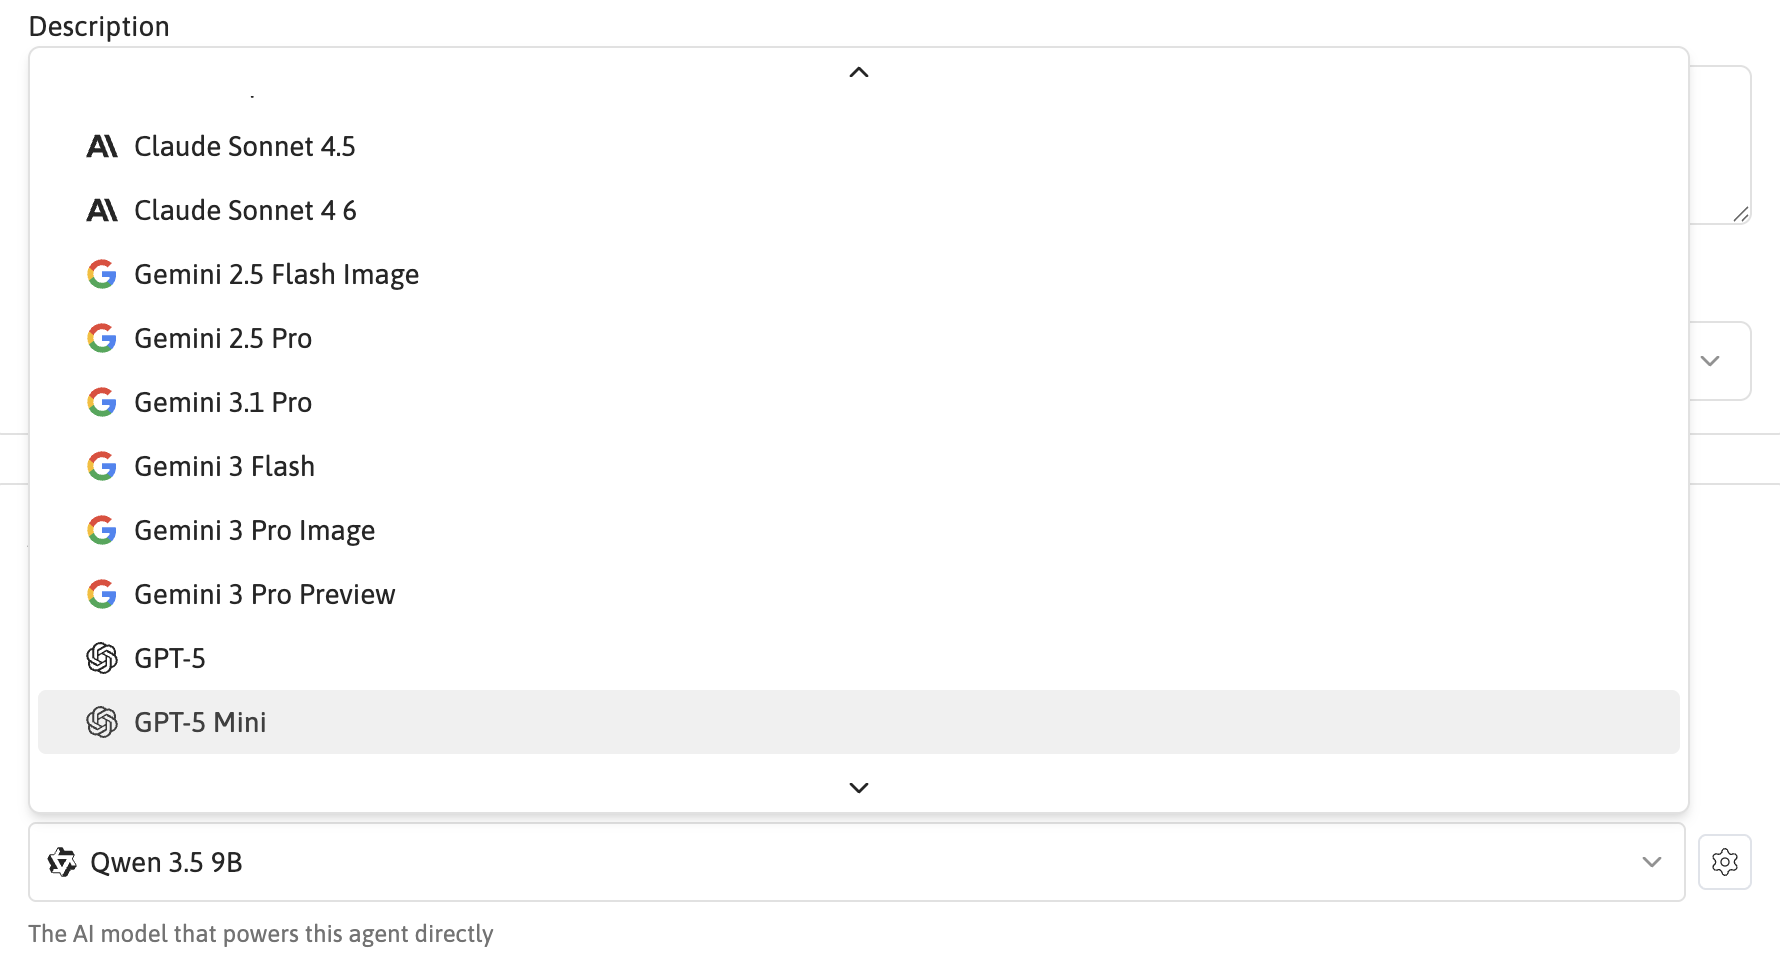
Select which AI model powers your Agent. Runtype supports models from OpenAI, Anthropic, Google, and more. The default model works great for most use cases.
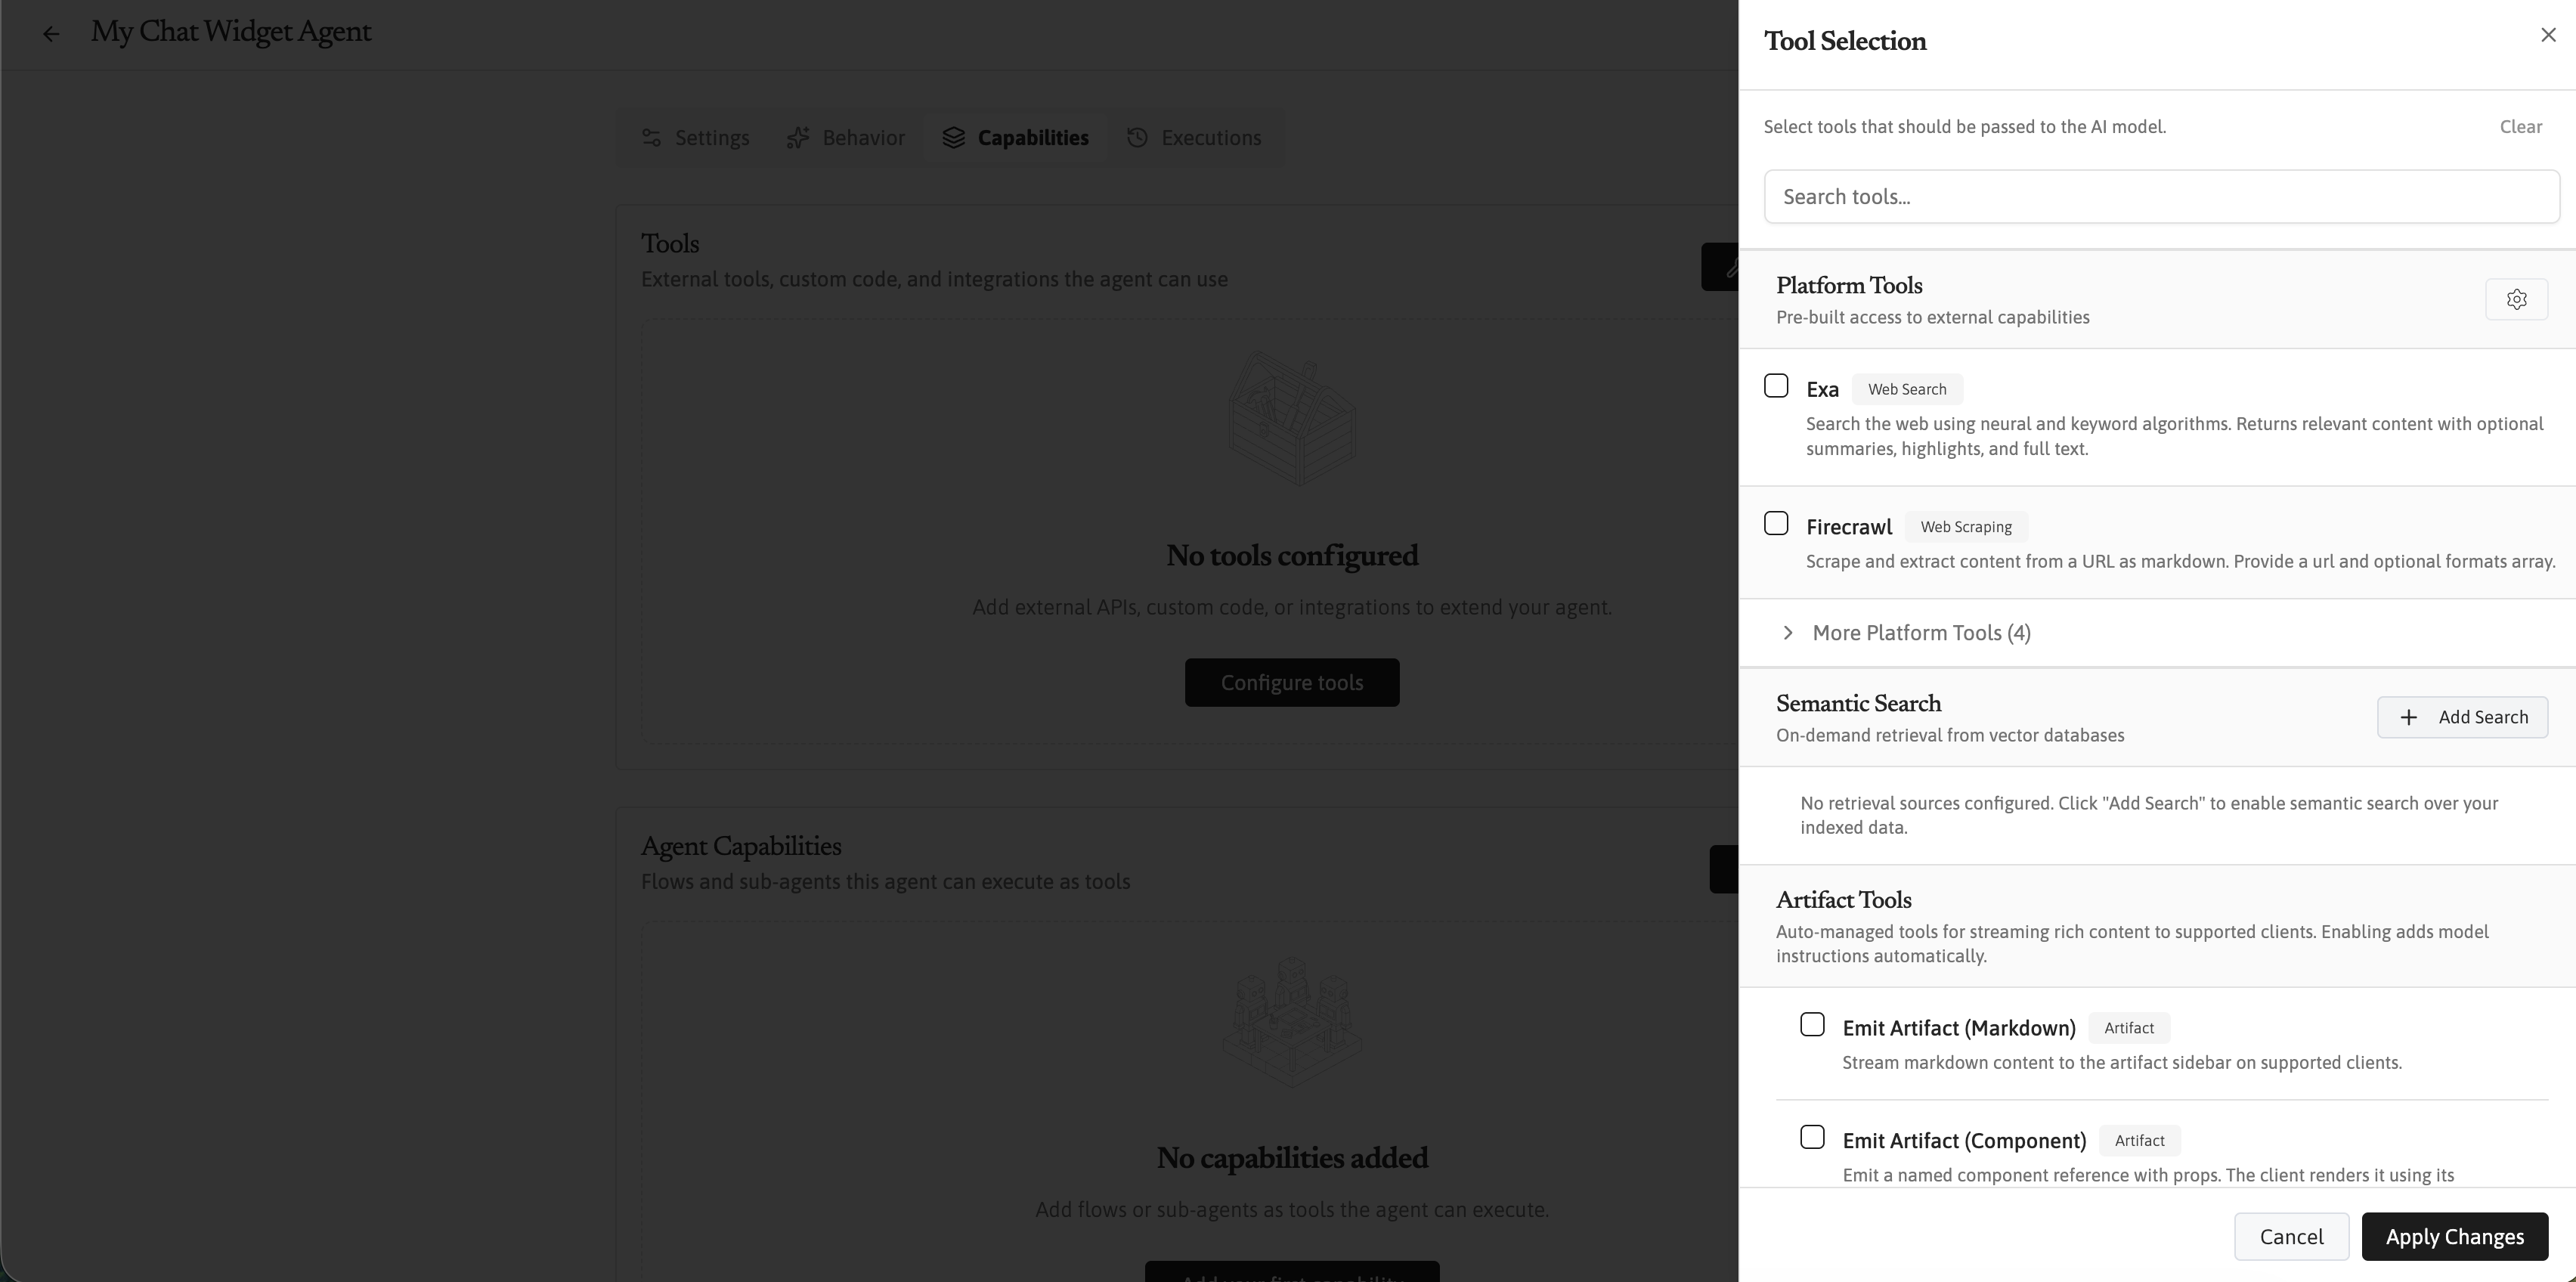
Tools give your Agent the ability to take actions — like searching the web, looking up data, or calling external APIs. You can skip this for now and add tools later.
Some popular tools to consider:
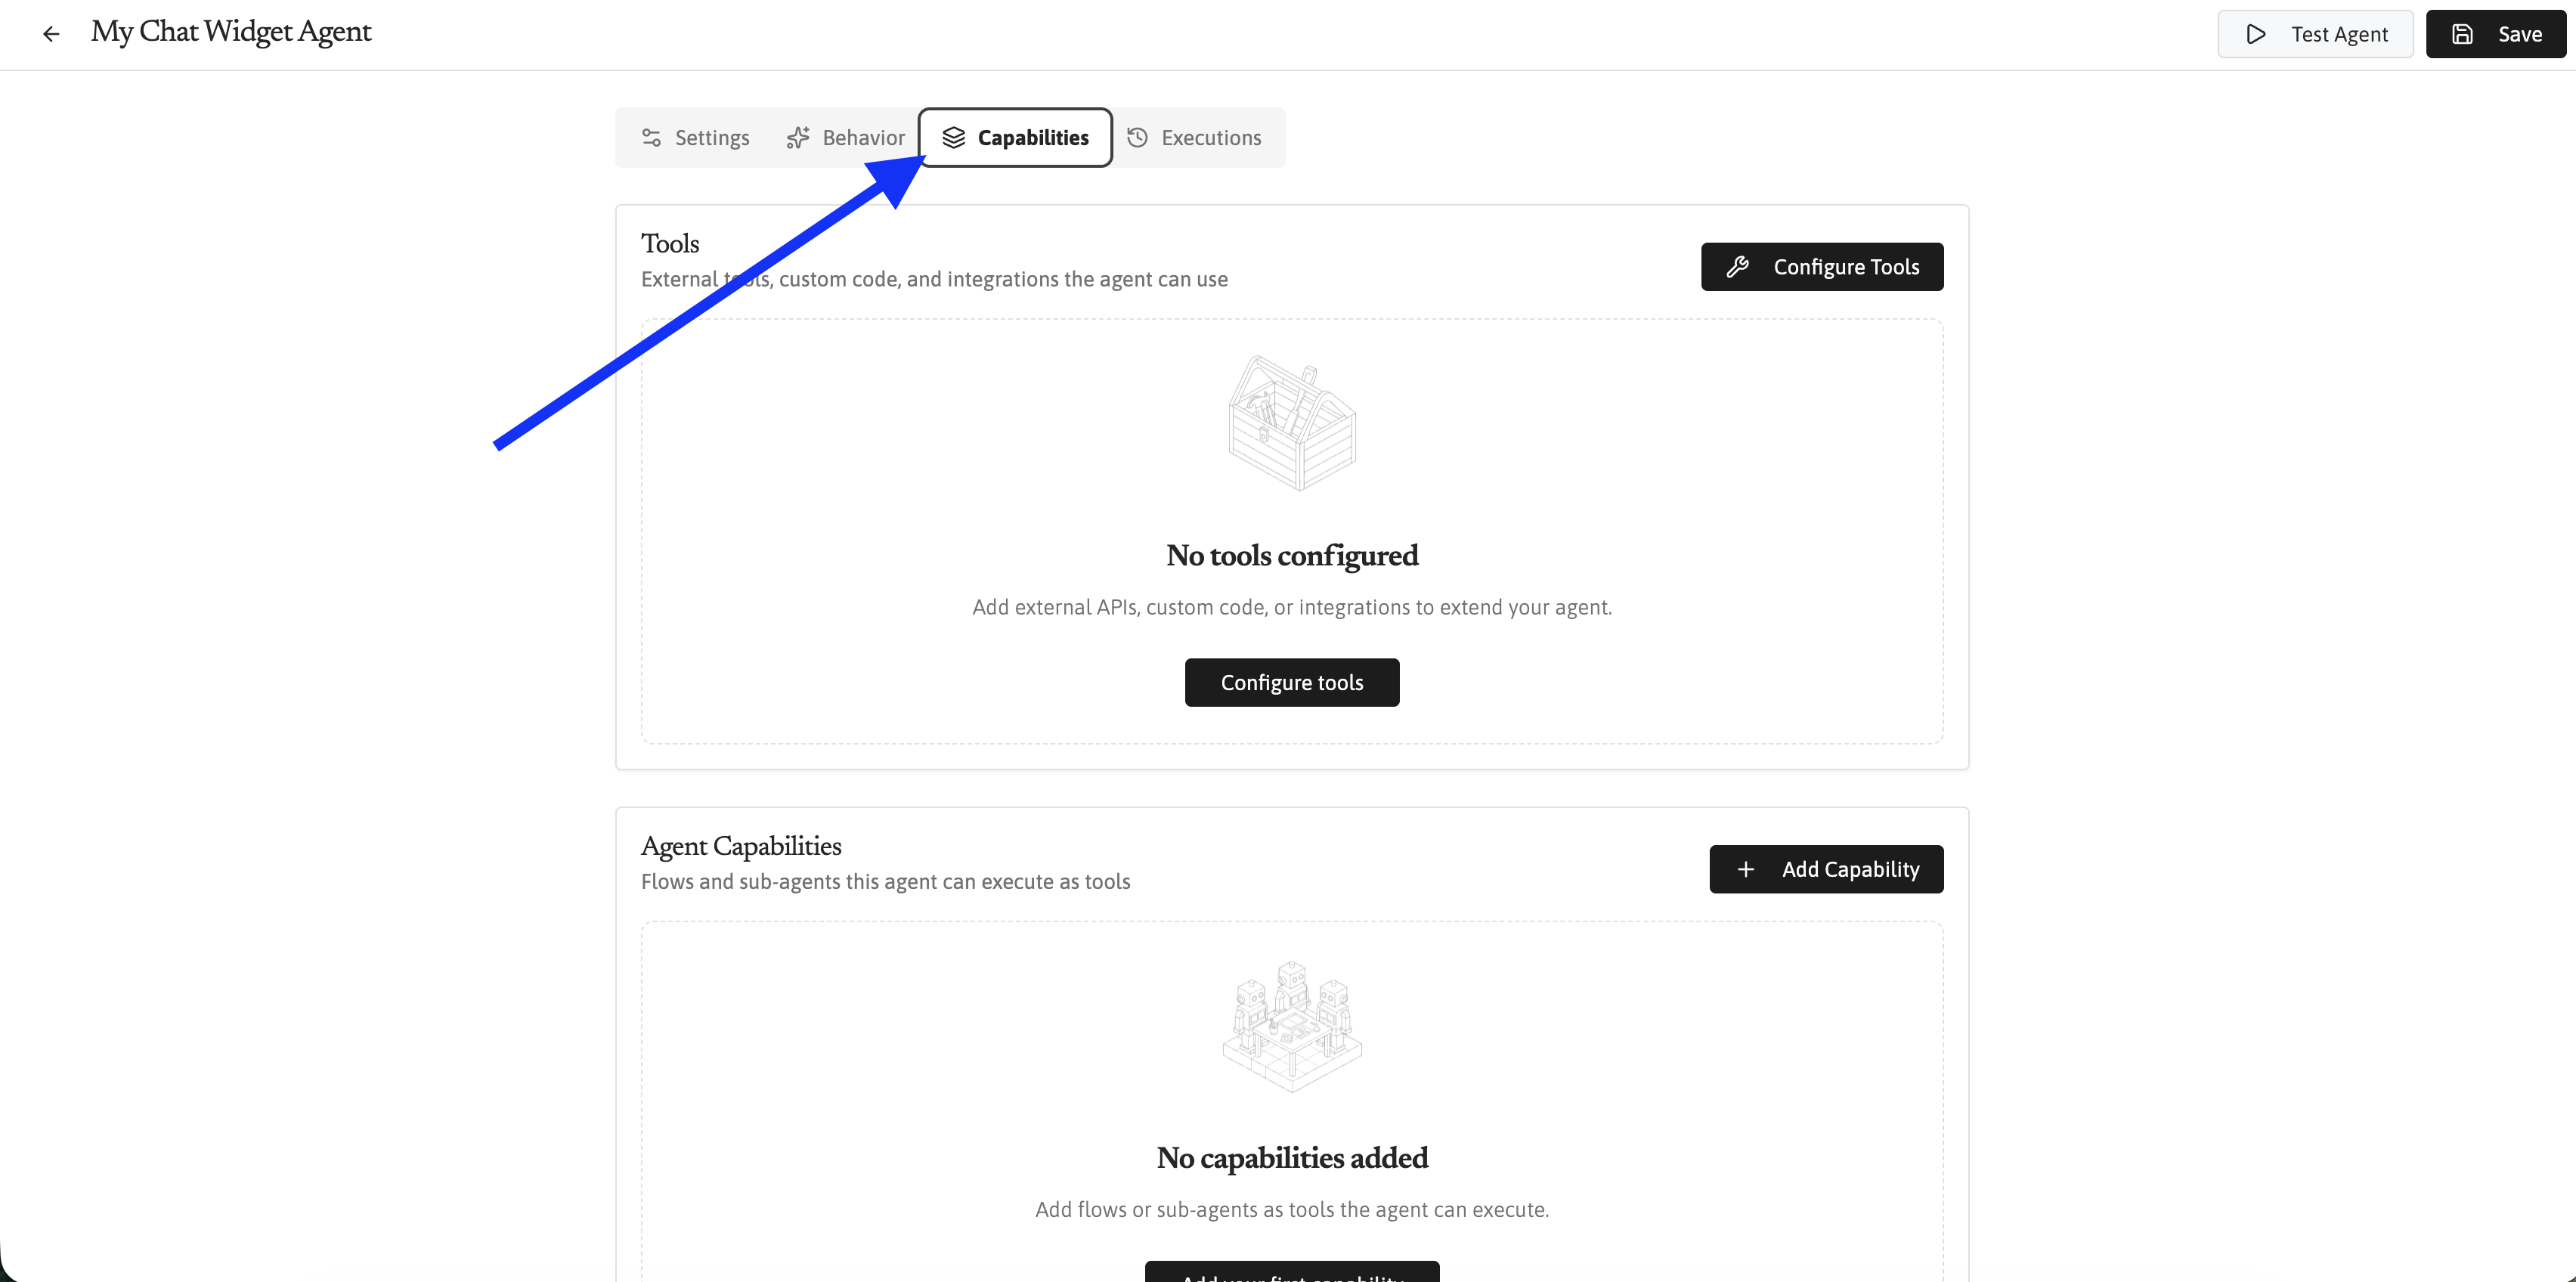
Click Save when you’re happy with your Agent configuration. For a deeper walkthrough, see Creating and configuring Agents.
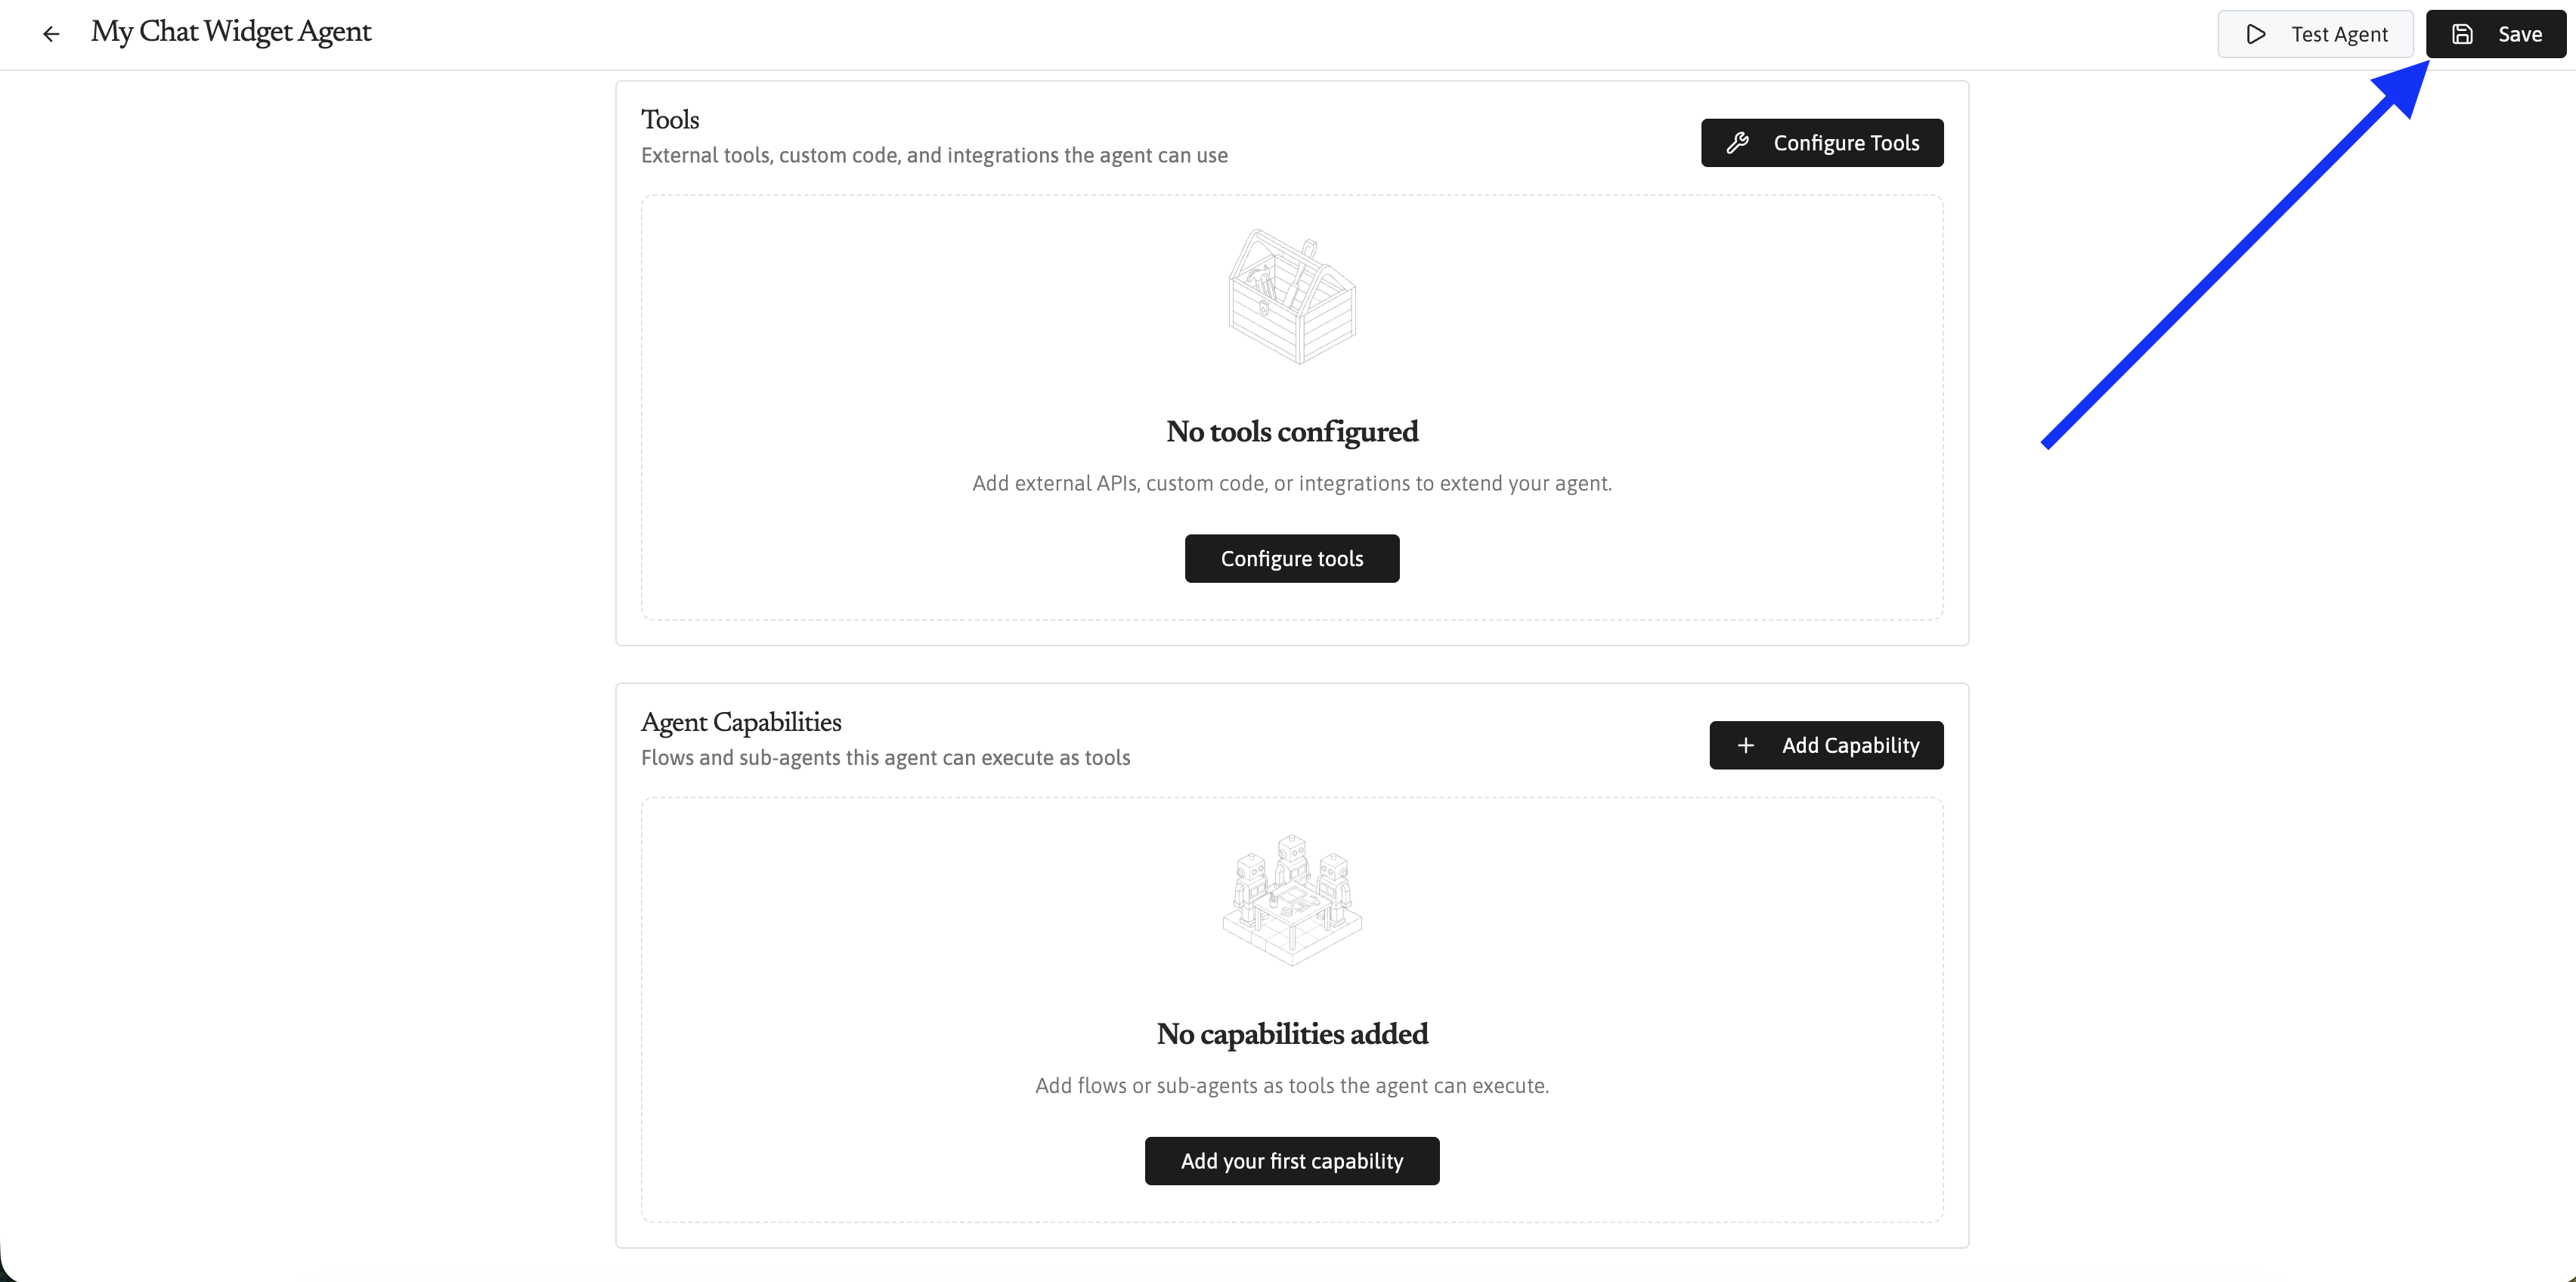
Next, you’ll be back at your Product. Select “Save & Continue” to move to the next step: styling your widget.
Runtype offers several theme presets to get you started quickly. Pick one that matches your brand, or click Advanced Editor to fine-tune colors, fonts, and layout.
You can also use the AI theme generator inside the Advanced Editor to create a custom theme automatically. There are two ways to use it:
You can preview how the widget will look in collapsed, expanded, and fullscreen modes right from this step.
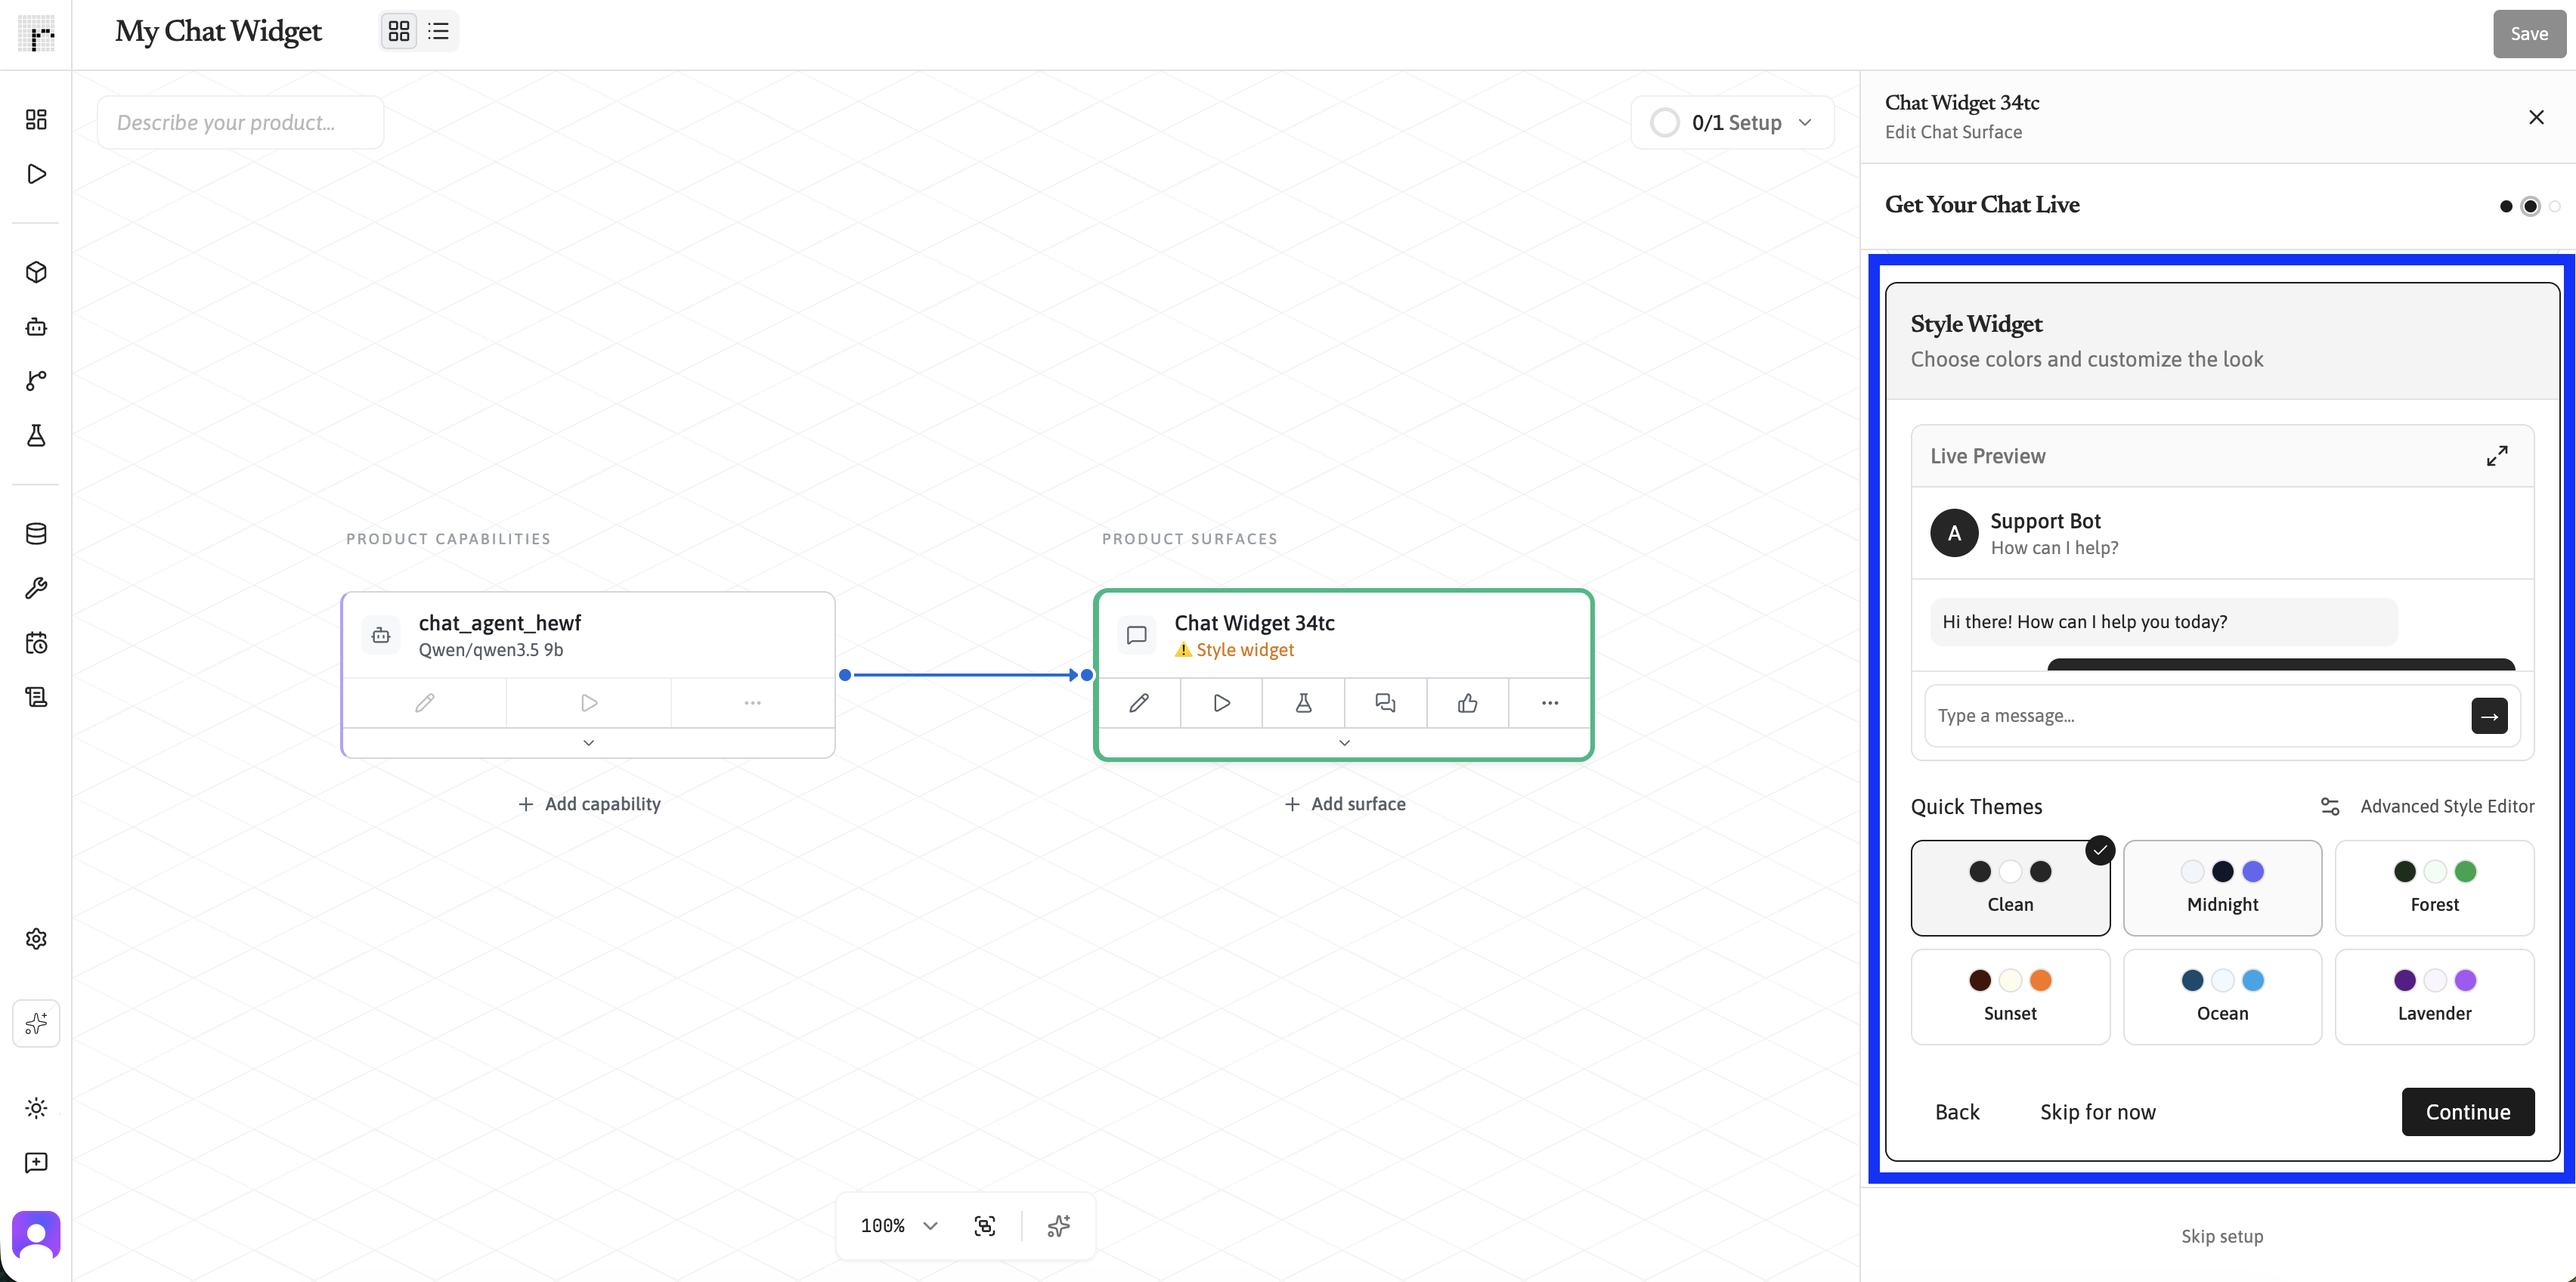
You can skip this step and come back to it later. The default theme looks clean and professional on most sites. Once you’re ready, click Continue.
The final onboarding step gives you the embed code. Runtype automatically creates a client token — a secure key that connects the widget to your Agent.
Copy the script tag and paste it into your website’s HTML, just before the closing </body> tag:
That’s it. The widget will appear in the bottom-right corner of your page.
If you’re using React or another bundler-based app, install the package and initialize the widget:
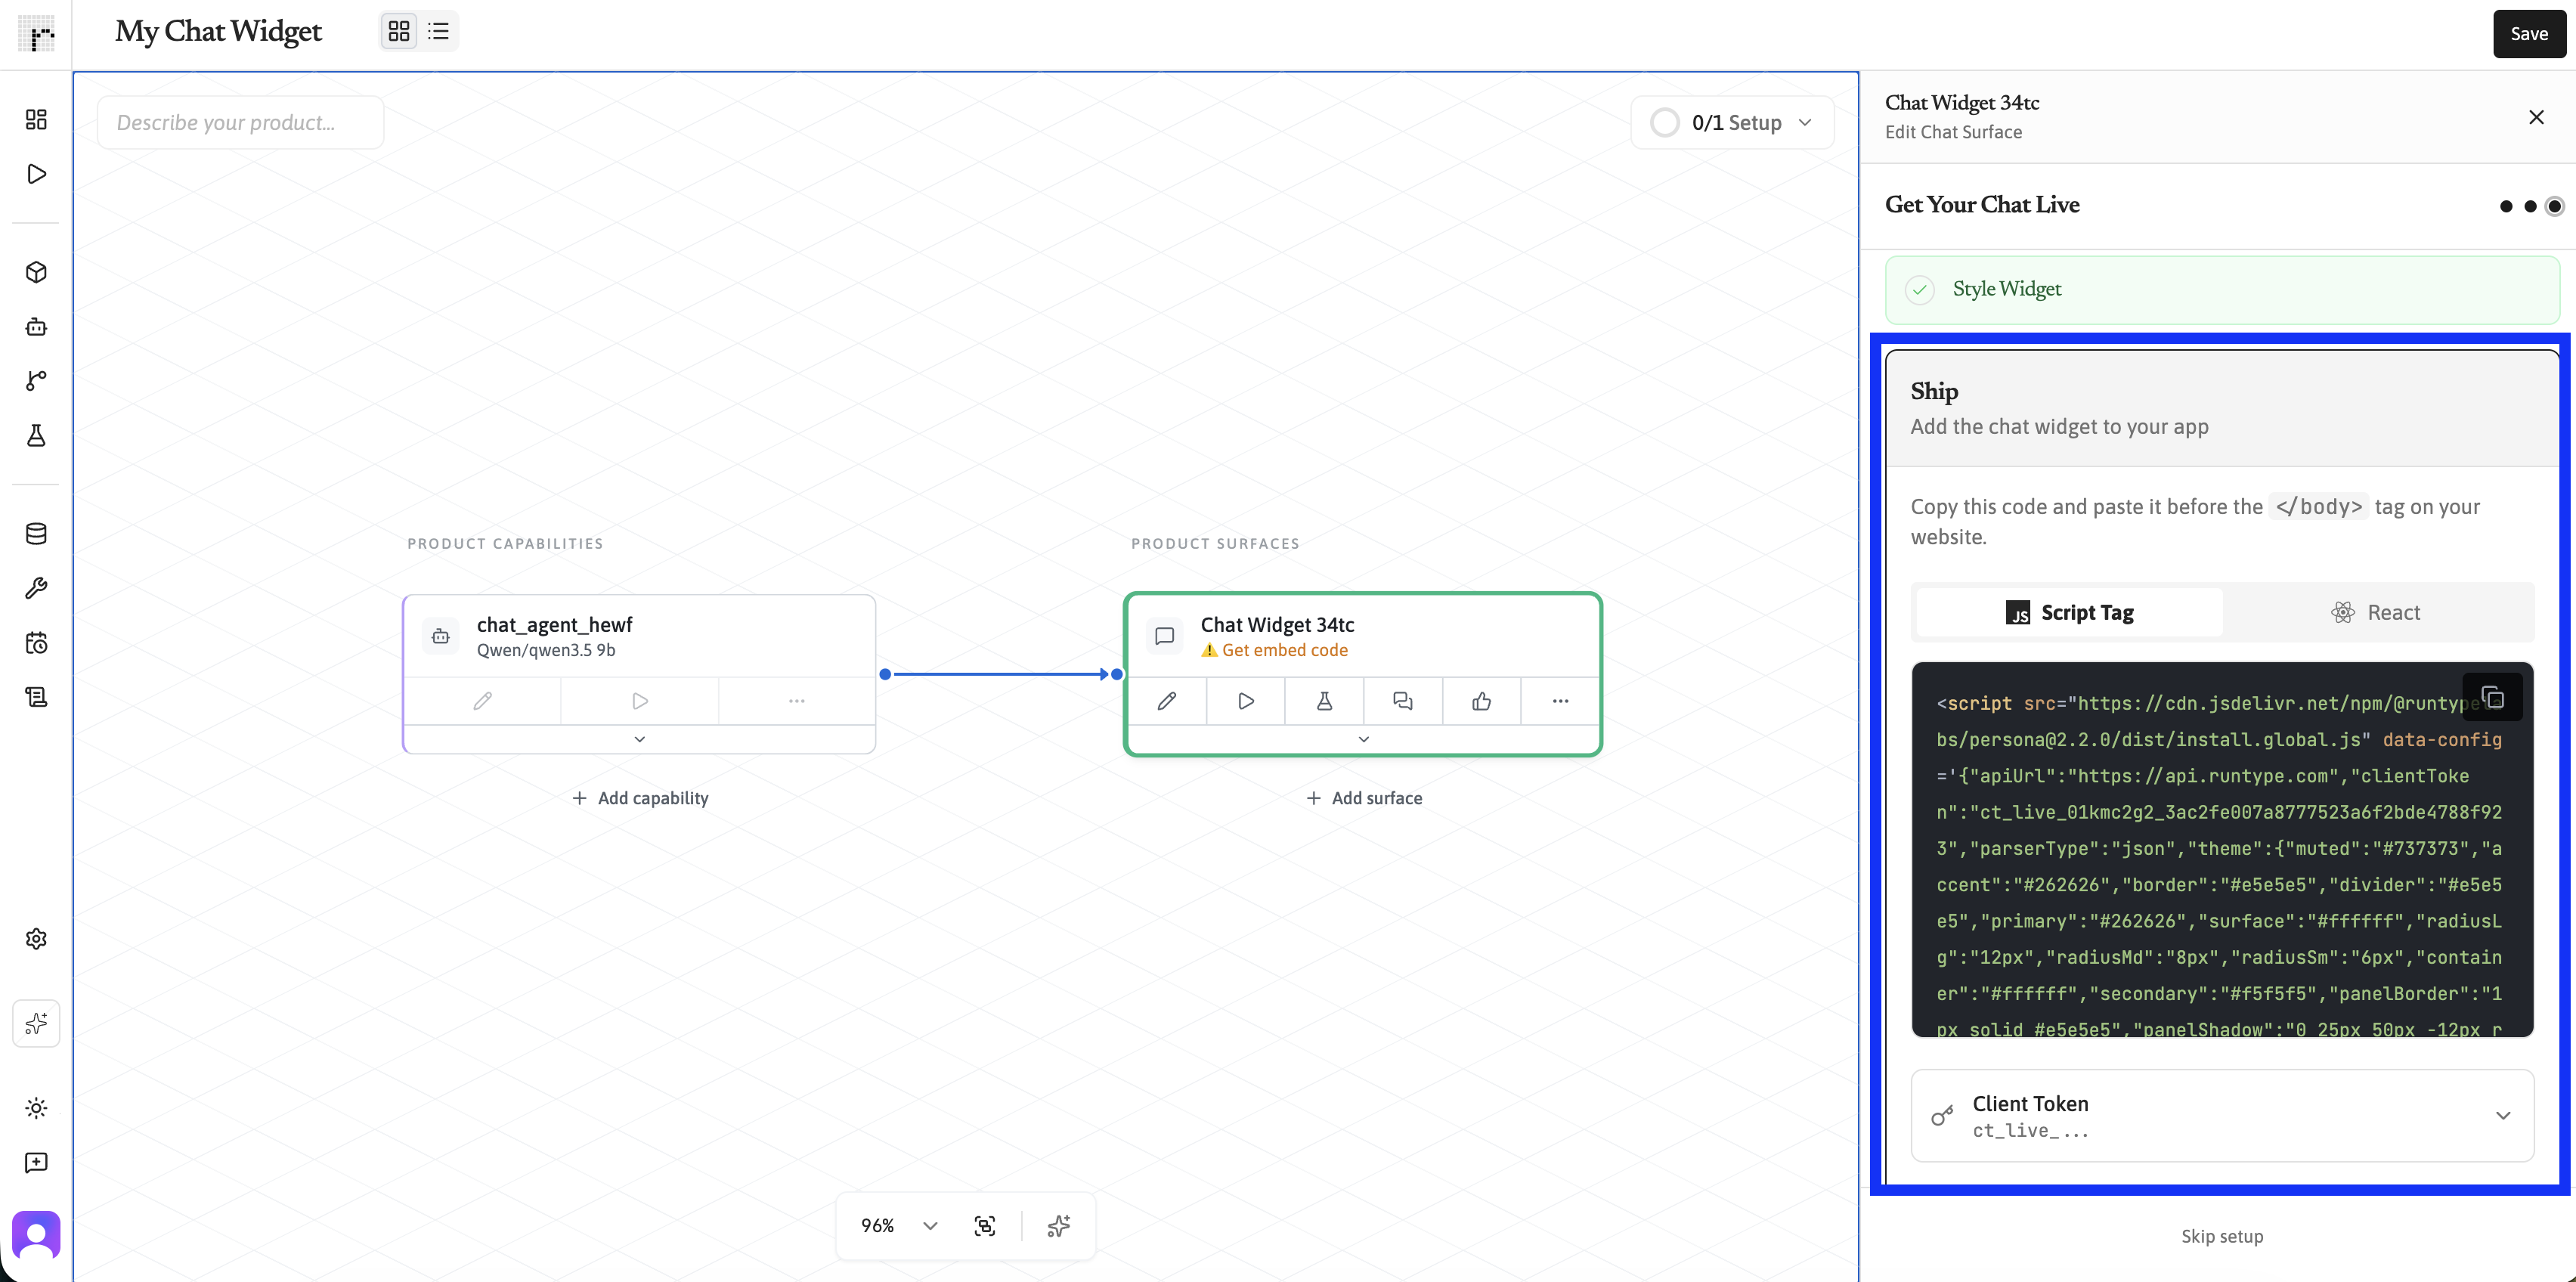
For local development, the widget works on localhost automatically. When you’re ready to go live, add your production domain to the Allowed Origins list in the Surface settings. For more detail, see Setting up a chat Surface.
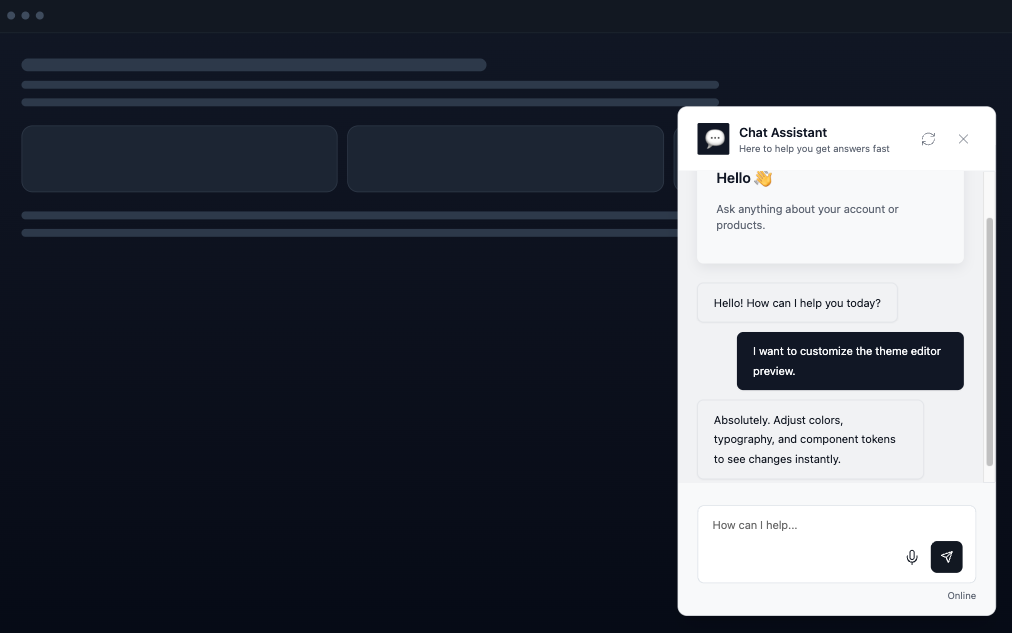
Send a message in the chat widget — either from the Runtype dashboard preview or from your own site. You should see your Agent respond according to the system prompt you wrote.
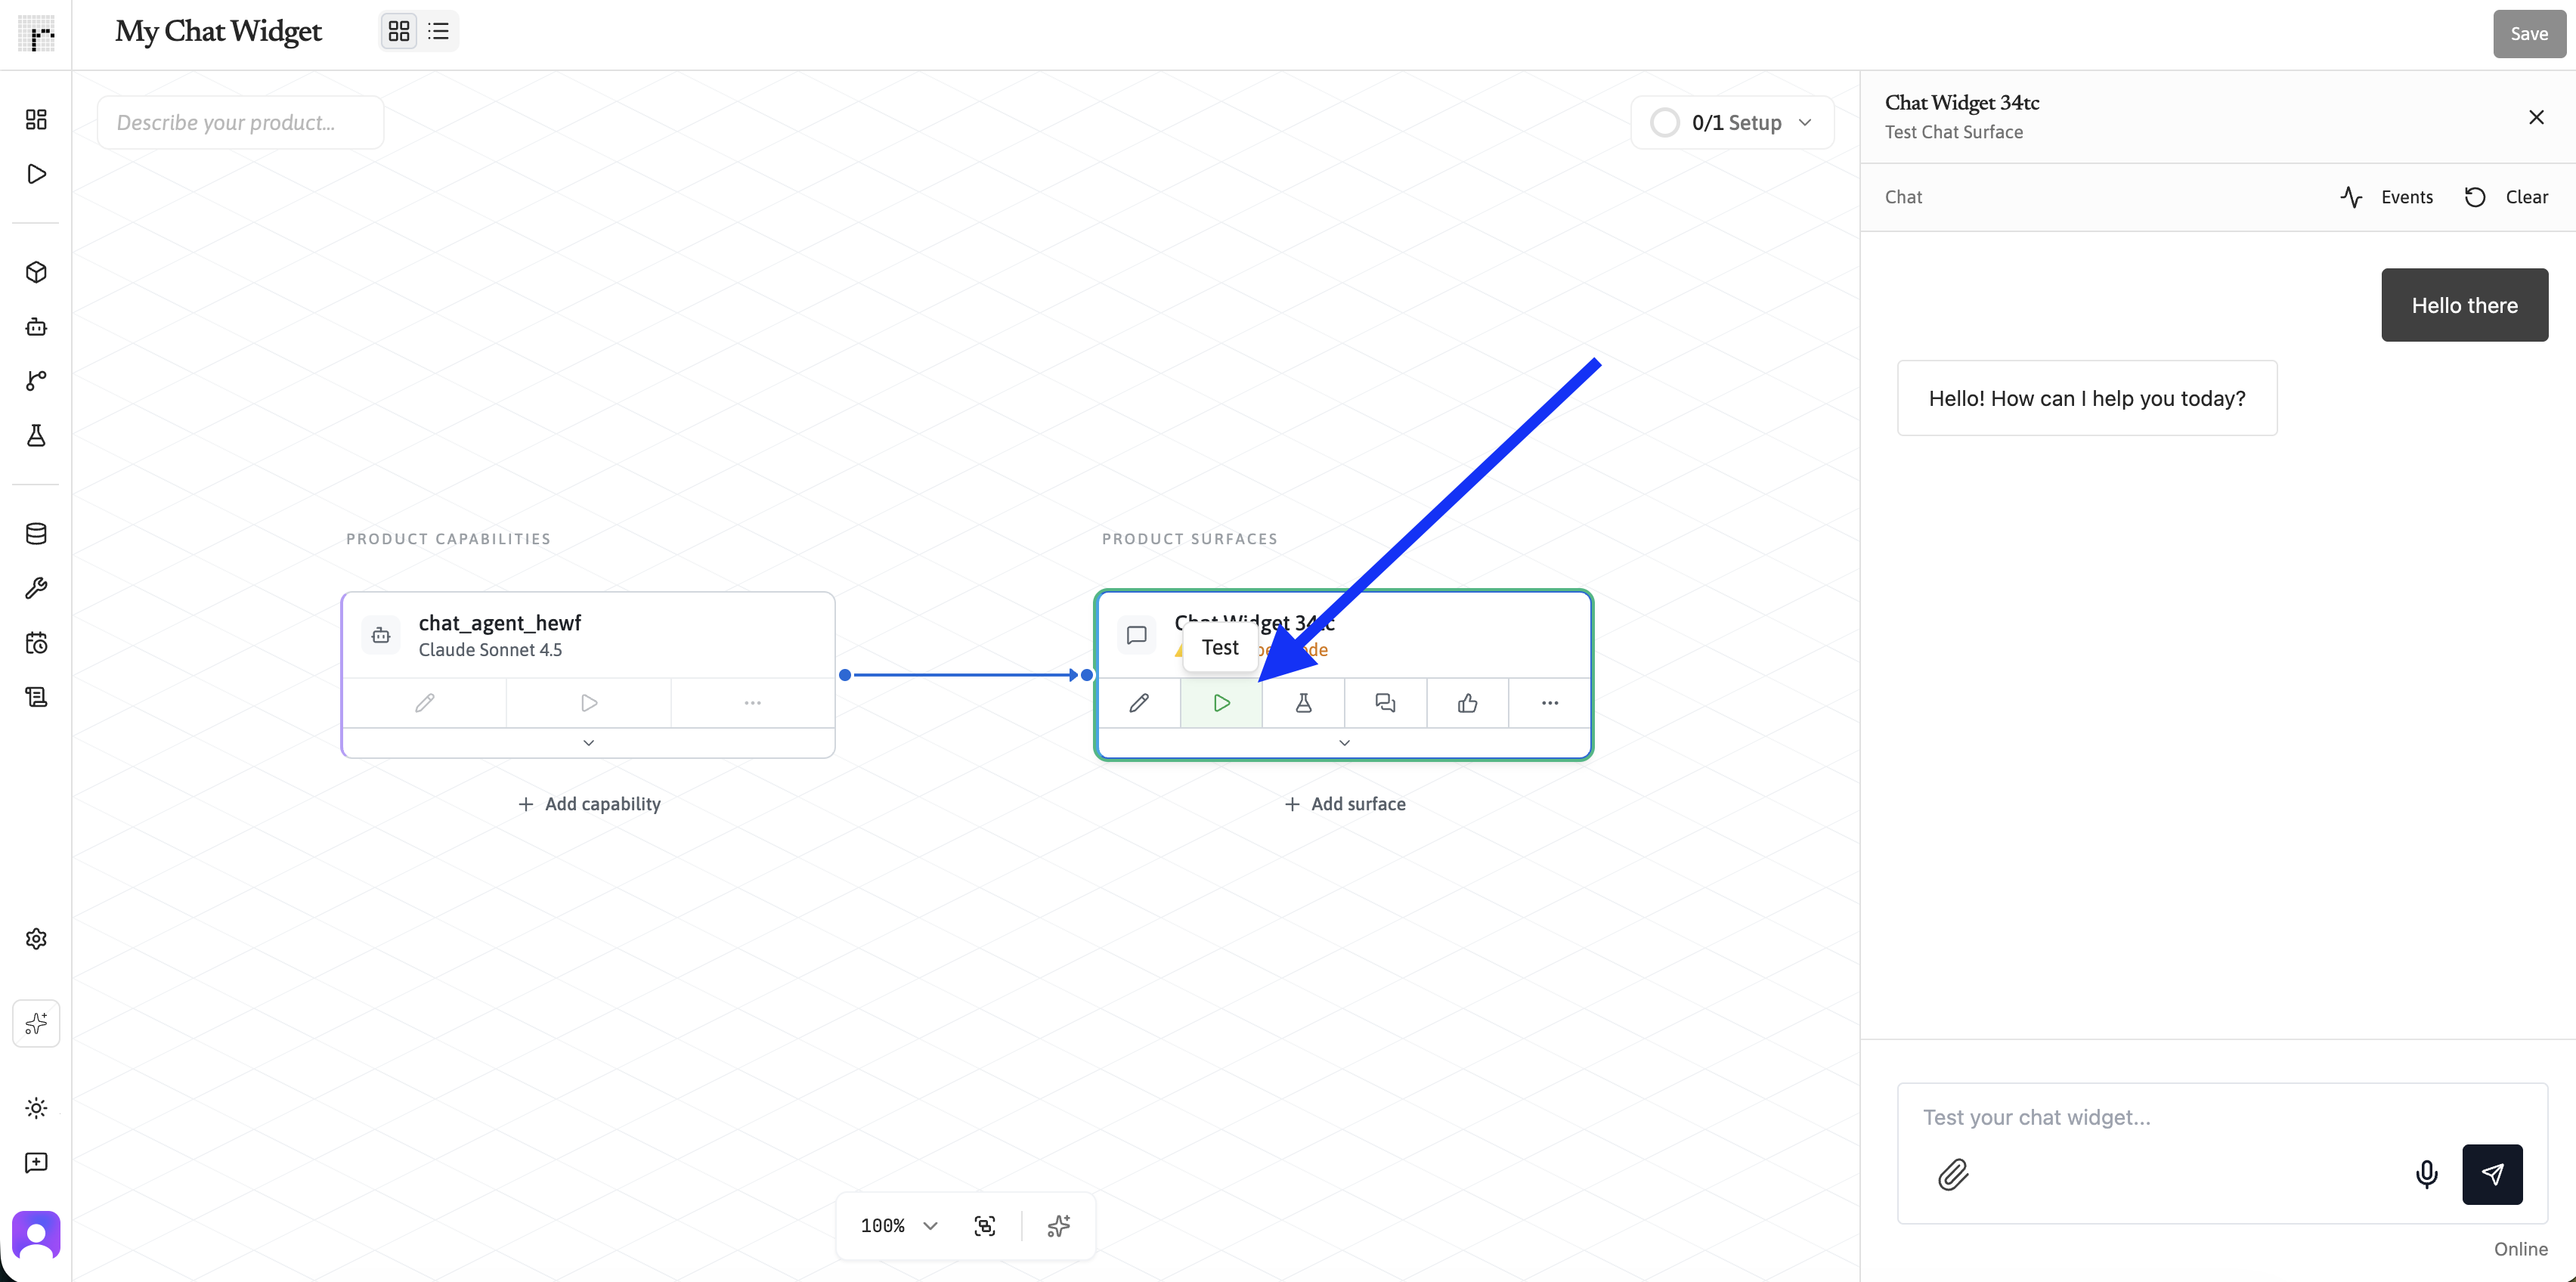
If something doesn’t feel right, head back to your Product and click the Agent Capability to adjust the system prompt, model, or tools. If you want to inspect behavior after testing, see What are Logs?.
Your Product can have multiple Capabilities and multiple Surfaces. For example, you could add a knowledge base search Flow as a Capability, then expose it through both the chat widget and an API endpoint.
Now that your chat widget is live, here are a few things you can do to make it even better: